![]()
Flash: Ah!
What the what ?
Err… yes.
It’s always that much less to load in the bag when it’s possible. But sometimes, it’s a necessity.
How to use it without a flash meter, nice and easy, without worrying about the exposure accuracy?
There is obviously plenty of automatic features available here on numerous cameras. But when we want to be sure about the result or when the camera is without electronics, we have to get our hands dirty.
Fortunately, a simple and ultra fast method does exist to nail it down each and every time using the Guide Number (GN):
GN = F × d
GN = Guide Number in meters or feet
F = F/stop value
d = subject distance in meters or feet
The formula is simple, however memorizing it is unnecessary. We will see why later.
All on camera speedlights, flashes or strobes (with a hotshoe) have a very useful power index: the Guide Number. This reference makes it possible to compare speedlights with one another. A small Guide Number indicates a low power light output while a big Guide Number indicates a more powerful light output.
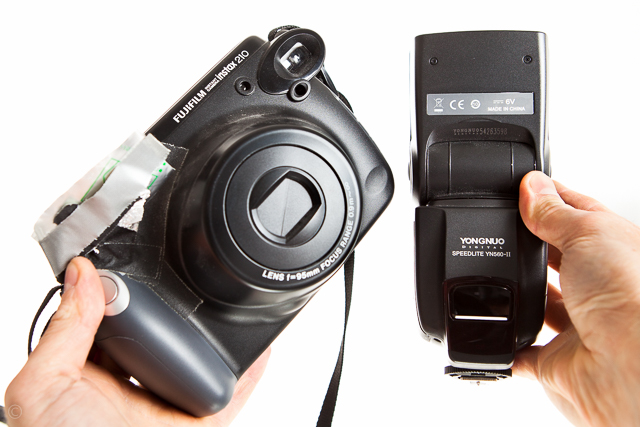
Two power equivalent speedlights
The Japanese original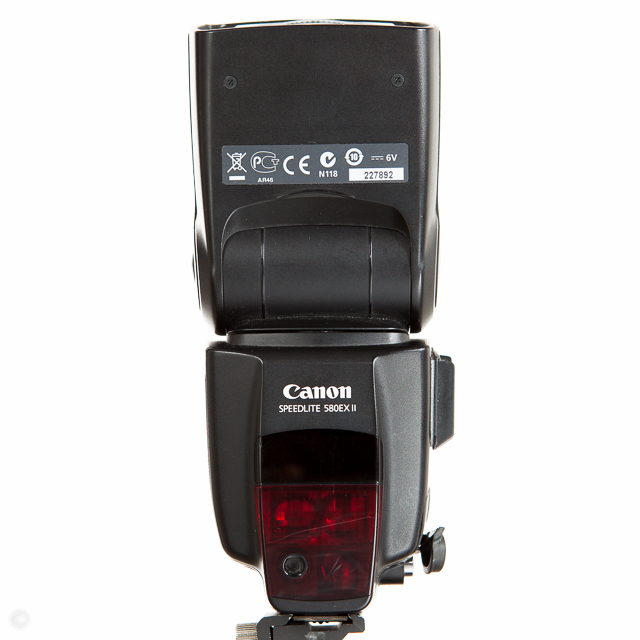
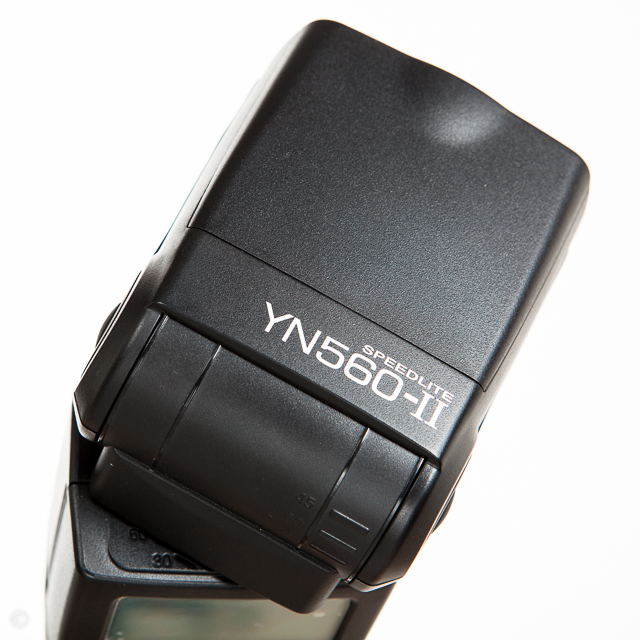
The Chinese copy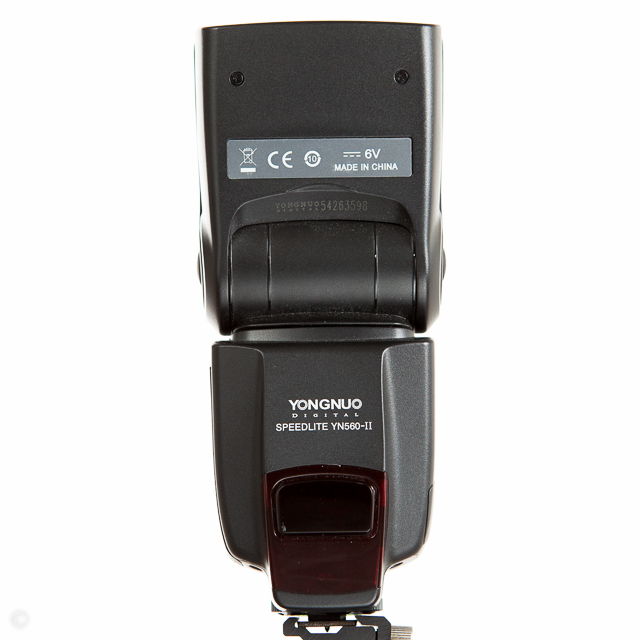
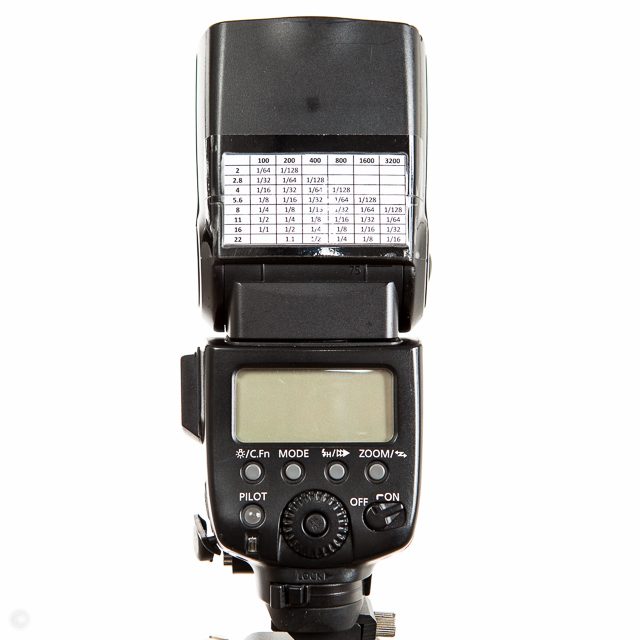
The back of the same beasts
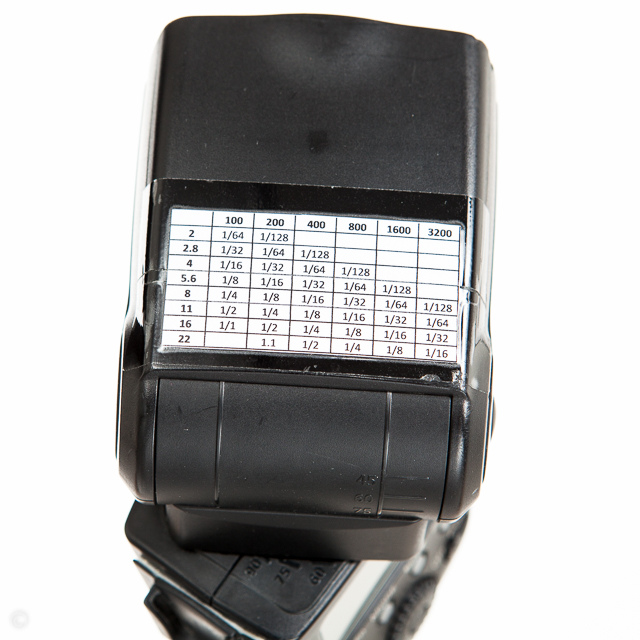
With the reference table
Without the reference table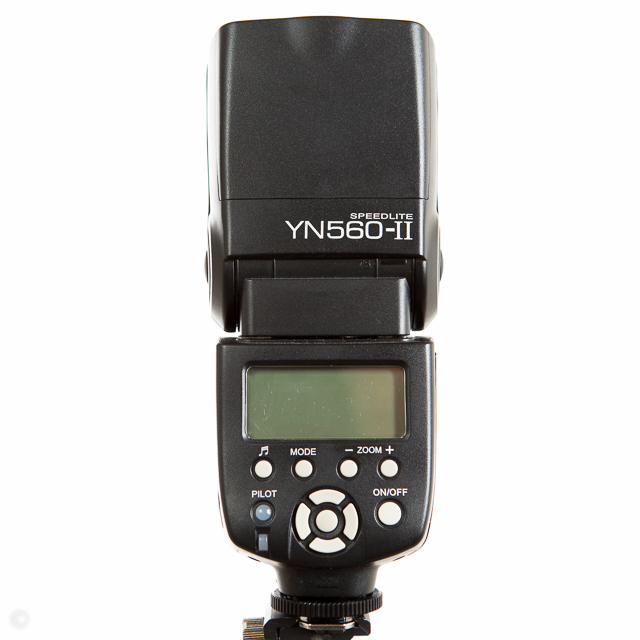
The reminder reference table is the magic trick to simplify the flash use in manual mode, without calculations so without possible errors, unless being exceptionally “thick skulled”… I will explain how it works further down.
Manufacturers indicate this Guide Number (GN) for a reference ISO speed of 100.
It is particularly striking to observe that at a distance of 1 meter/foot the Guide Number is strictly equal to the F-stop. This gives rather unusual large F-stop numbers for mid-range speedlights.
The two speedlights presented above have the same Guide Number: 58 meters or 190 feet
So for a Guide Number of 58/190, to take a photograph of a subject at 1meter/1feet with an ISO speed of 100 one needs to close down the aperture to F/58 or F/190 (reminder: a foot is about a third of a meter)! Not a very evocative a number …
Conversely, with the same Guide Number, using an aperture of F/1, we can light a subject at a distance of 58 meters or 190 feet ! This is more evocative as some F/1 lens do exist (albeit expensive), 58m/190ft is quite far away!
Beware: foot trap
For speedlights that do have a zoom function (to fit the lens focal length – this is automatic and/or disengageable), the marketing guys left their footprint: Guide Numbers are given for the maximum zoom value… Because obviously the more the light beam is focused the greater its reach. But in the reference manual all equivalent Guide Numbers are given for each focal length.
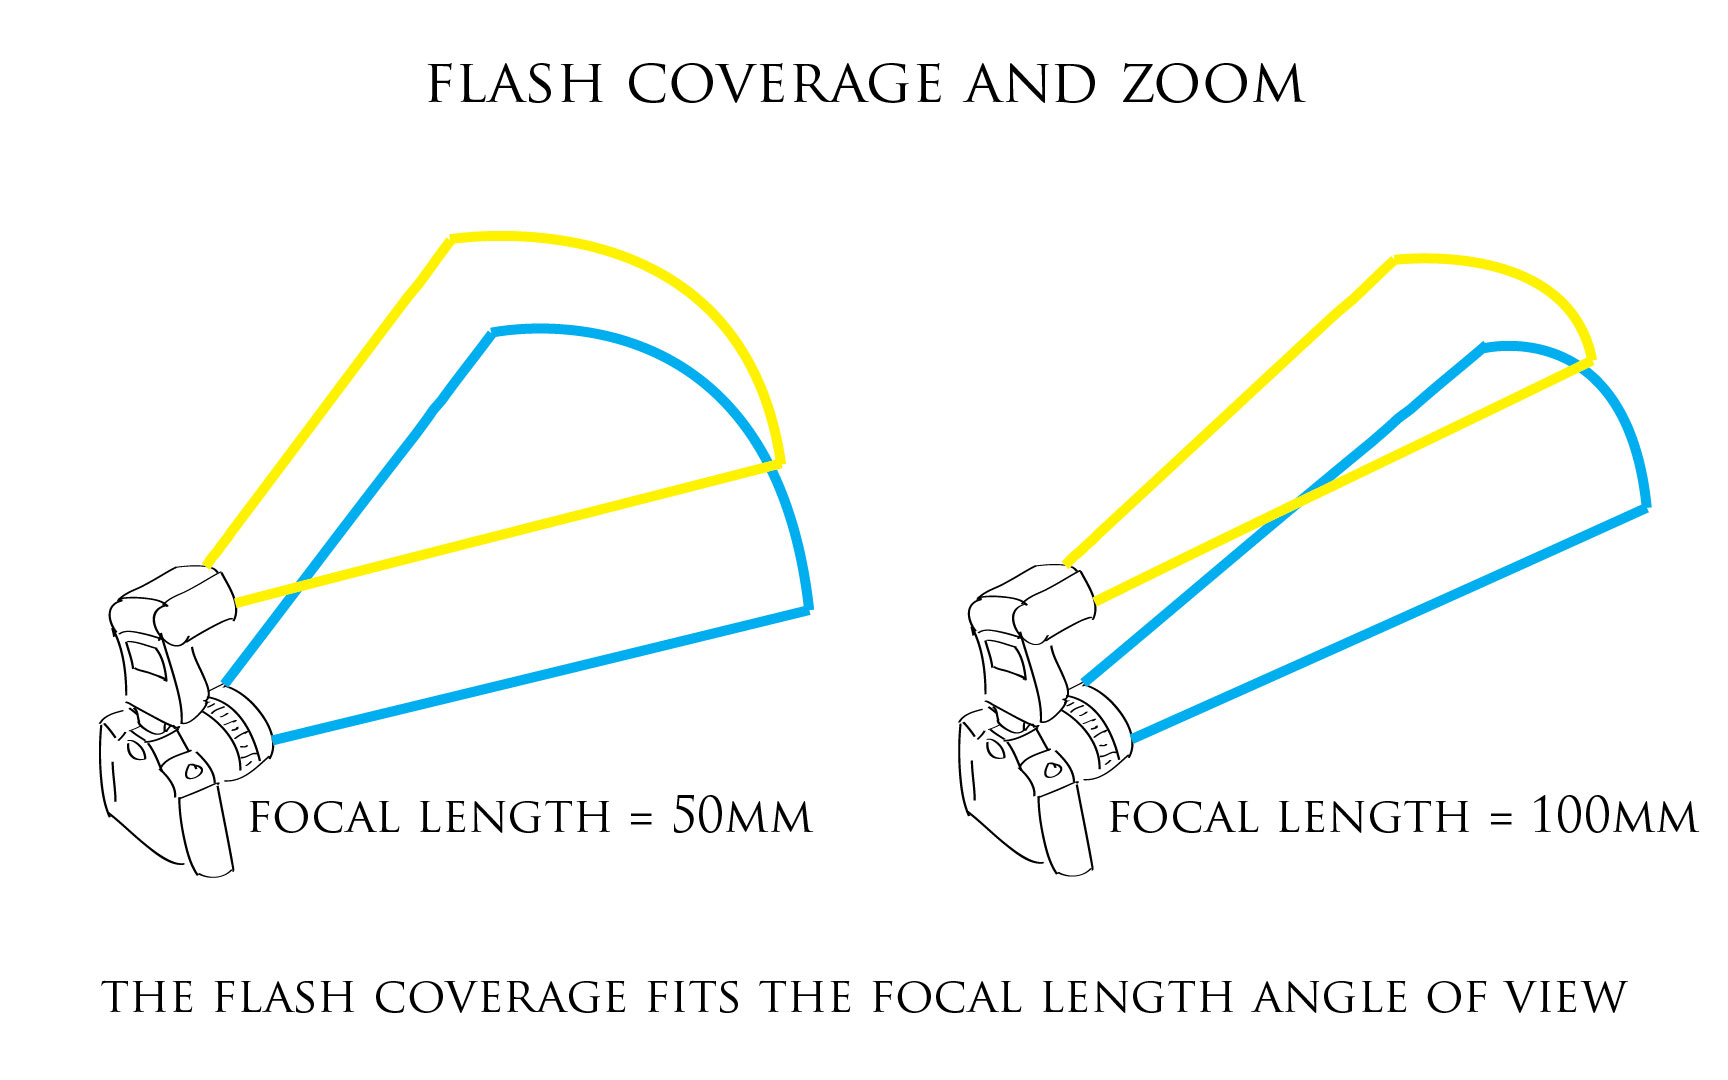
Let’s see with these strobes given for a Guide Number of 58m/190ft. This value corresponds to a zoom of 105mm, but in the manual we can find the Guide Number for a focal length of 50mm.
Given the Guide Number formula, the film ISO speed and the flash zoom value, it sums up to a lot of small calculations to do (not including the distance), to take a photograph. Although these calculations are quite obvious one is at risk of forgetting to adjust the results by the flash zoom value, the film ISO speed etc …
In order to avoid confusion I am using a unique Guide Number corresponding to a reference focal length, which for me is 50mm (cf hereunder GN = 42m/138ft).
Power table: Canon 580 EXII manual extract
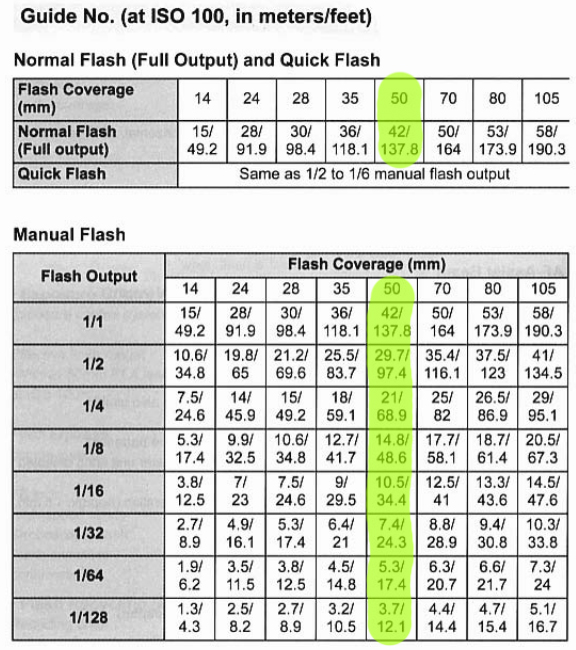
The power level is presented as it is displayed on the flash control screen: as a fraction of its maximum power output: 1/1. So 1/2 represents a half, 1/4 a forth of the maximum power output etc… I will come back another time on the usefulness of the power fraction system to represent the light output of the speedlight.
All things considered the simplest way is to reduce the number of variables in order to create a reference table (for a fixed subject distance) which will be pasted on the flash head. All that will be needed to adjust the flash power or the lens F/stop will then be just a quick glance at the reference table on top of the flash.
To obtain a clear table we set the focal length at 50mm (if this is the most used one), we can now focus our attention on just one column of the manual power table (the one colored in green). and eventually we need to set a flash to subject distance (we will see which one further down).
With the help of the formula GN = F × d we can deduce for each line of the column the adequate F/stop to use: F = GN / d. So for a film ISO speed of 100, and a fixed distance, we obtain each F/stop value to use for each output power level.
Deducing the power level to use for all other ISO speed is quite simple when we know that we gain one F/stop as we double the flash output (power). So if 1/64 is the power to use at ISO 100, we will have to halve this power if we go to ISO 200, and set it at 1/128.
Reading the table: for a flash to subject distance equal to the reference one, everything is presented on the table. If we choose an aperture value, the reference table gives us the flash power to use for a given film ISO speed. If on the contrary we choose the flash power, to save battery for instance, then the reference table gives us the aperture value to use. Simple, quick, efficient and without possible error.
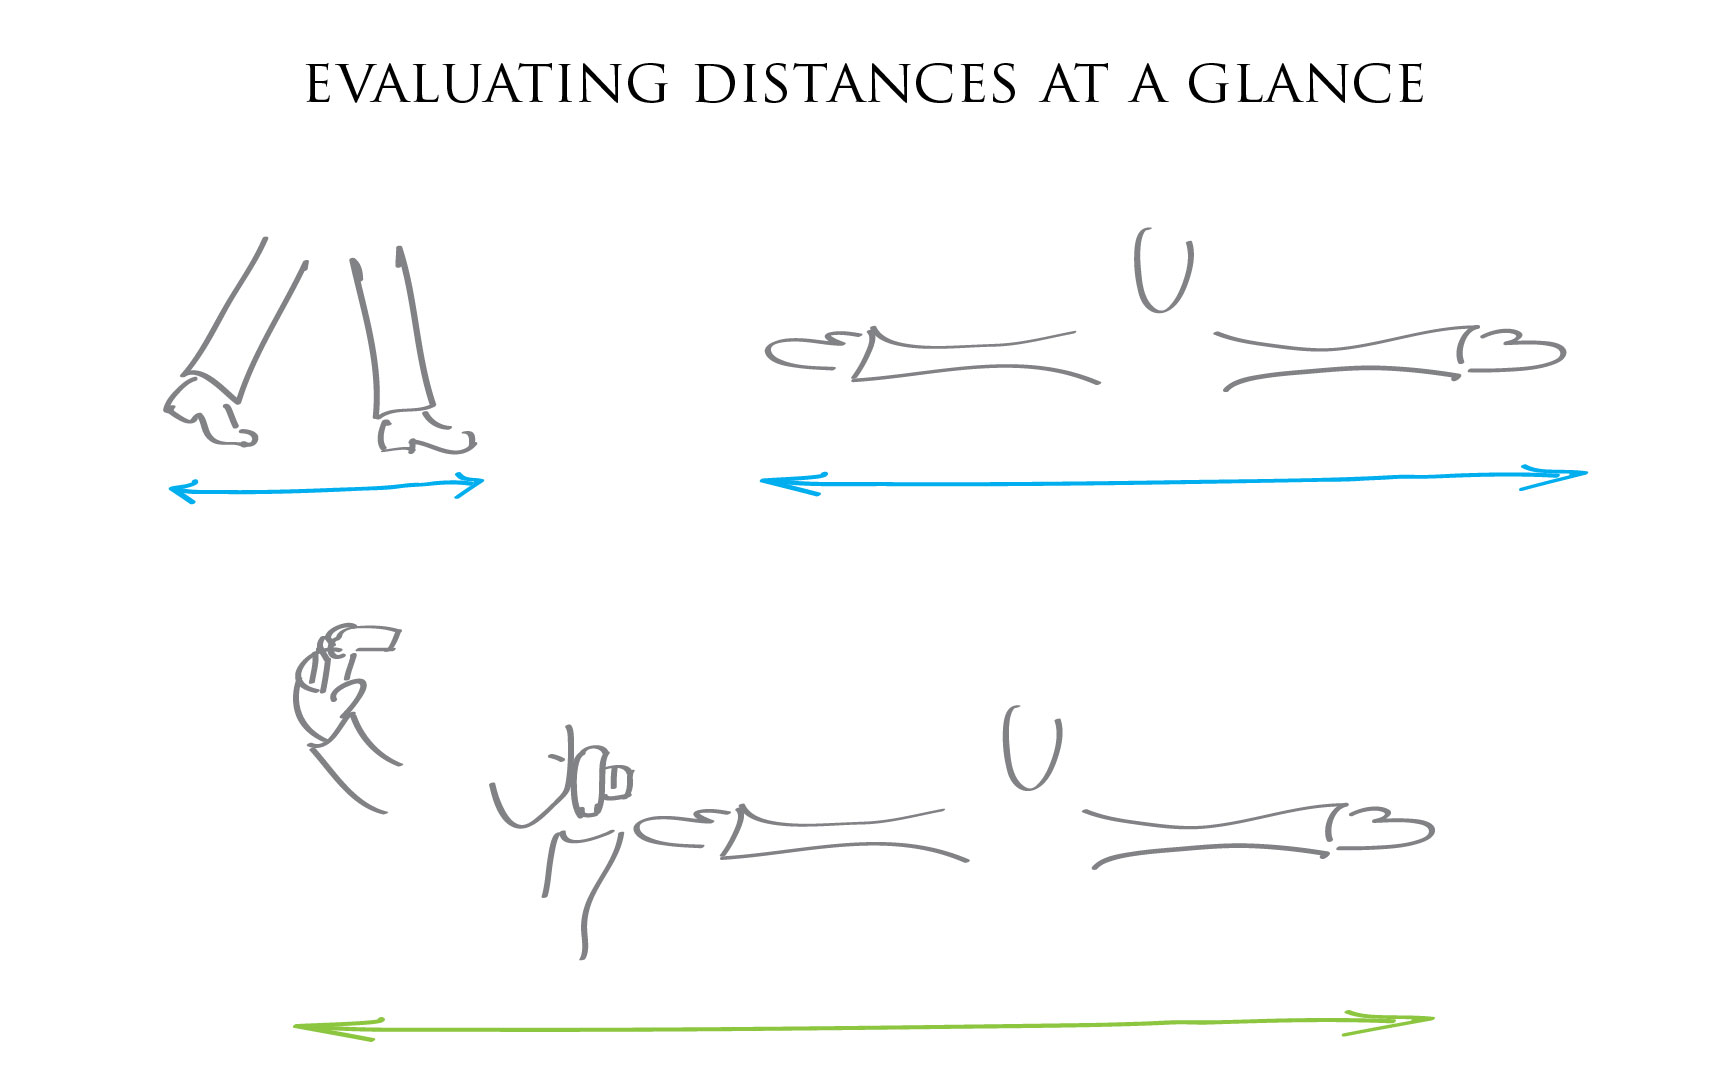
What to do when the distance is not the one used in the table ? First we need to evaluate the flash to subject distance. Here again there is a rather simple and efficient way to avoid ending up entirely off target.
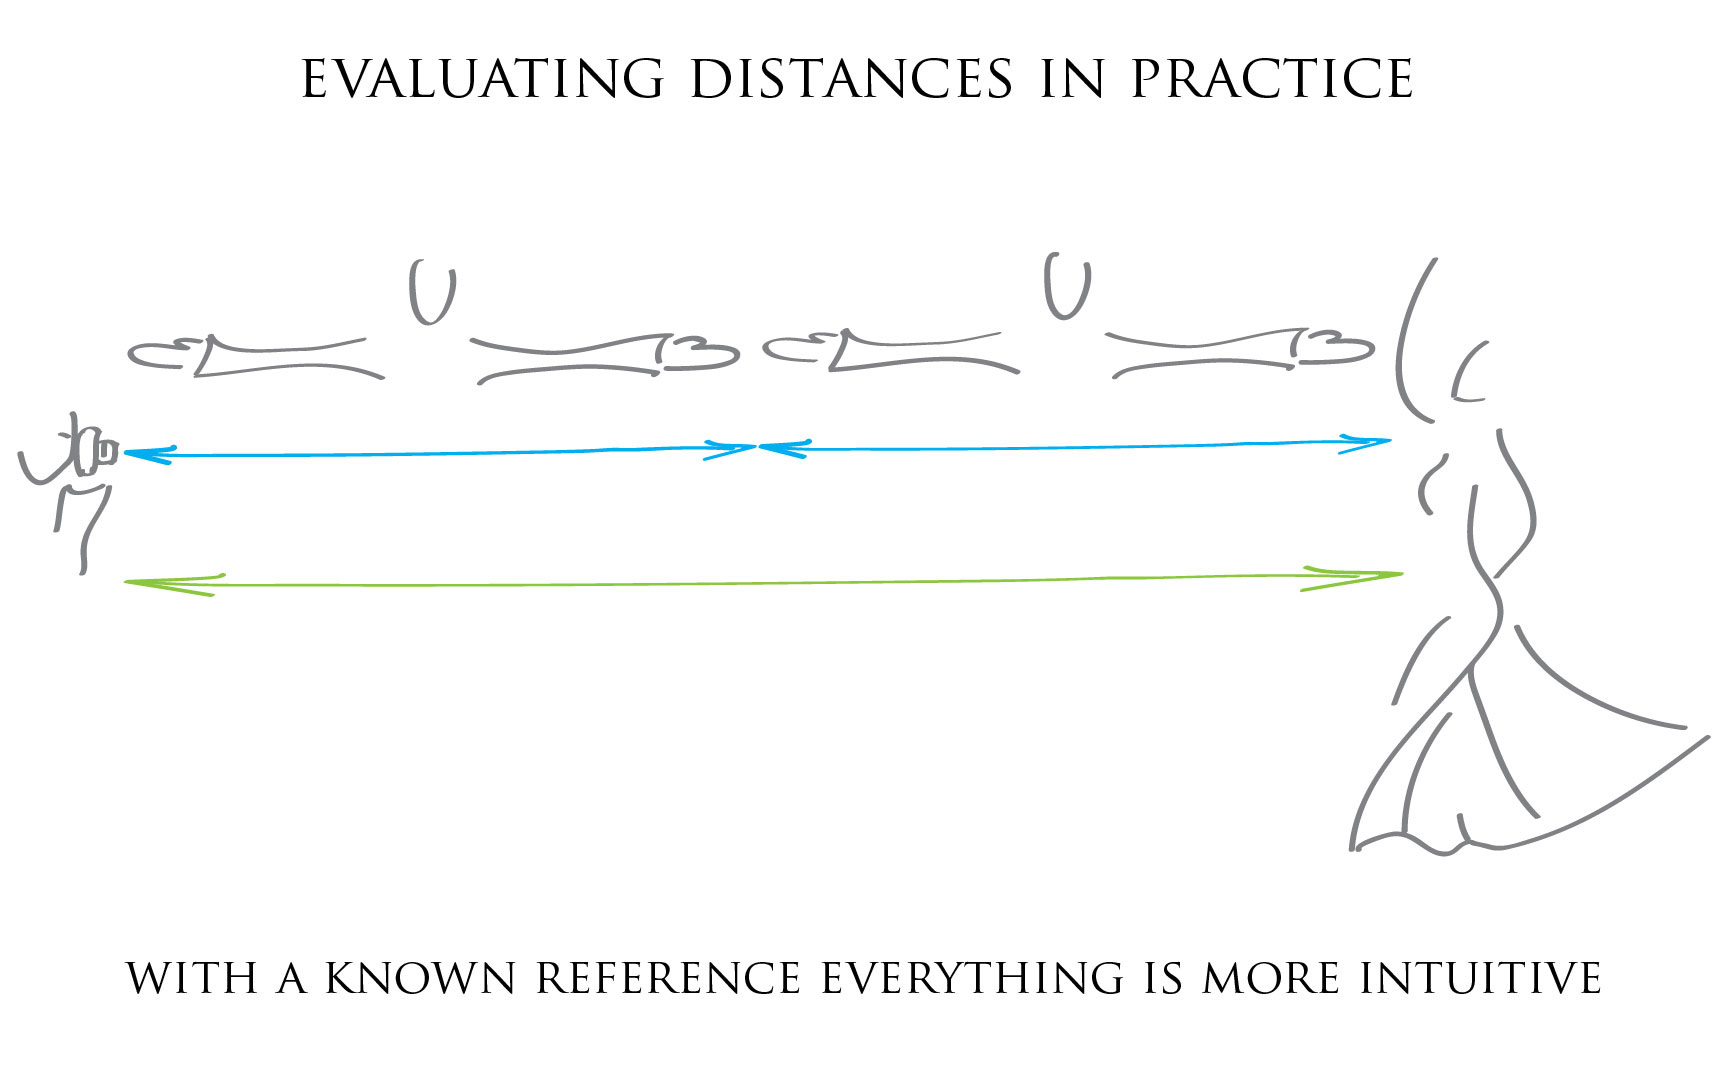
Evaluating a distance in meters/feet is not easy for everyone. However evaluating a distance as a function of one’s arm’s length or foot steps is much more intuitive and falls right on target for most of us. My personal reference distance for establishing the table is the one between my hands, arms stretched plus the distance between my head and the flash that I hand hold behind my shoulders (as I don’t put it on the camera).
No use to get nervous about the accuracy of the measure, most of film emulsions are able to absorb an error of 1 F/stop, apart from the inversibles (slides) which are more demanding on this front.
Once the distance is evaluated, how can we use the reference table ? quite simply when we realize the following phenomenon: when the distance doubles we loose 2 F/stops: we go from say F/8 to F/4 for example, and in the opposite direction when the distance is halved.
In order to ease the task in practice, one must avoid using for reference distance a distance which has no practical use such as 1 meter or 3 feet for instance. Better taking for reference a distance easy to use intuitively. It obviously can be different for everyone.
The simplest thing to do is then to think of distances as a multiple or a fraction (double, quadruple, half, quarter etc…) of the reference distance. If the distance is the double of the reference then we need to make a shift of 2 column on left to read the value. Conversely if the distance is half of the reference one we need to make a shift of 2 column on the right to read the proper value.
And voilà ! that’s all, quite efficient and simple, no need of “TTL-and-all-these-sorts-of-things”. Well almost: we understand easily why automatic flash exposure such as TTL or ETTL are very useful when we don’t know what the flash to subject distance will be (or when the subject is moving too fast). But these are rare situations or very characteristic of a certain type of shooting assignment. Moreover a manual flash exposure will not be affected by the reading of an unfavorable environment.
As usual in photography, automatic measures work quite well on their own only in certain particular conditions. The rest of the time we need to apply them a correction … Then better avoiding useless troubles. Given that in film photography we can only confirm our good judgment after the negs are developed, it’s easier to dodge a cold sweat by putting on our side a maximum of verified parameters.
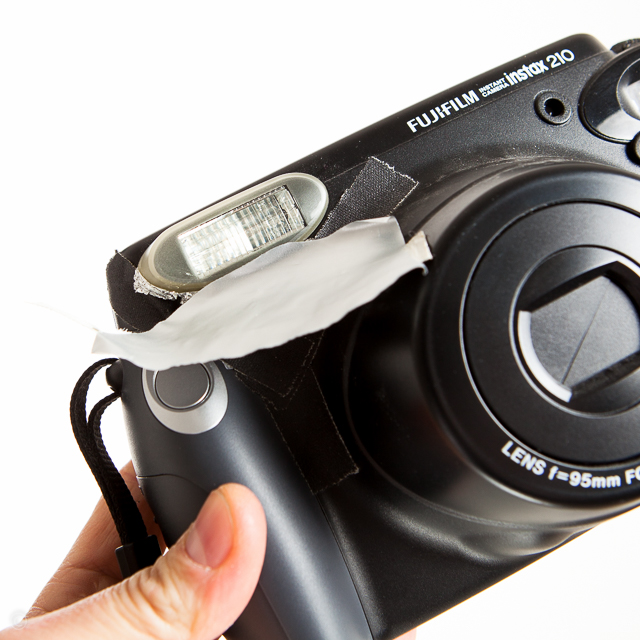
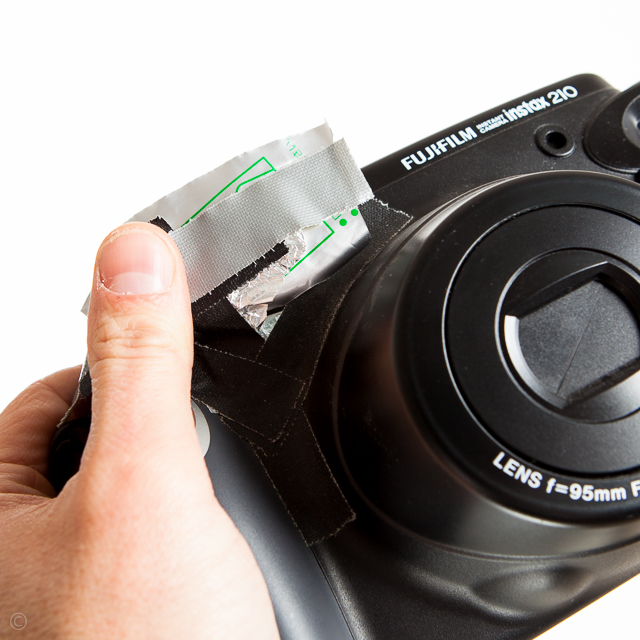
Why not using the automatic flash exposure on a camera such as the Instax-210 ? Because of this:
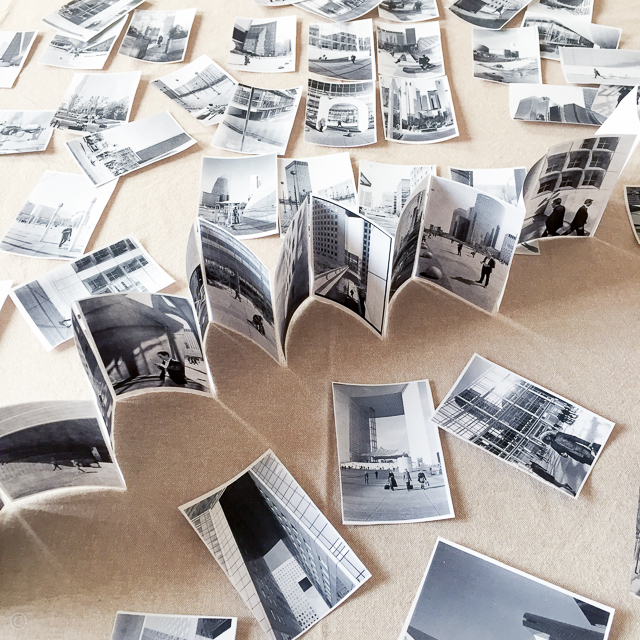
On the left integrated automated flash, on the right of camera manual flash
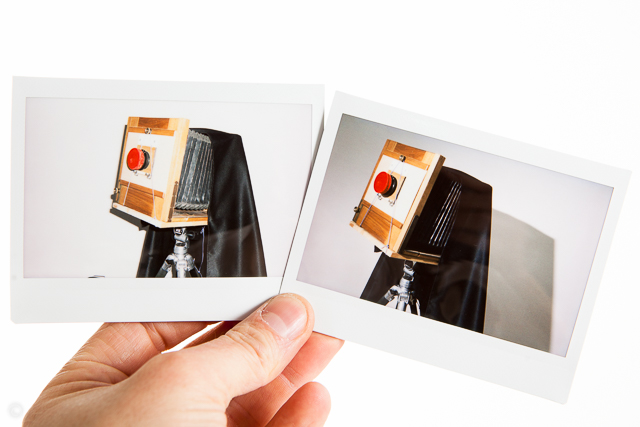
It obviously depends on each person’s taste but personally I prefer a thousand time the right version in which we get back the third dimension! Same thing for a portrait. I use regularly this technique on film but on instant film there is no possible way of altering the shot, the proof that it works beautifully is blatant.
In a few words how does it work with this combo ? Simple: we hide the flash with some shiny paper which reflects its light backwards and/or upwards, this light flash will then trigger a hand held speedlight set according to the reference table as described before. The YN560-II flash has got a slave mode which allows it to be triggered as soon as it detects a flash of light.
NB: The shorter the distance and the more accurate one needs to be ! Under 2m/6ft one needs to pay attention, and below 1m/3ft it is better to avoid a big mistake. Beyond 5m/15ft it would be quite a shame to be completely off. This comes from the way the light energy scatters with distance. I will come back to that another time.
Conclusion: if we join this method to the sunny 16 one, it comes to mind that we can tackle the photography realm totally manually, without a single electronic measure (even if it has its rightful place for certain applications). It is all the more liberating that it is rather simple. Almost too simple, and this is what can be fearsome, because all this gear “mambo-jumbo” can be reduced to something as simple and accessible as a pencil. And the most frightening thing about a pencil is the blank page underneath.


To use an analogy, the flash s auto-mode sensor is like a bucket that you re filling up with light when you take a flash shot. When the bucket is full that is, when enough light has been added to make a proper exposure the sensor kills power to the flash, effectively stopping the flow of additional light.
It is a good analogy indeed when the flash is used in an automatic fashion. What is discussed above is more of a fully manual use of the flash in an easy way …
How do you calculate for a bounce flash?
Hi, quite simply by “guess-timating” the distance. It’s a lot less accurate than direct flash due to a variety reflections but it will put you in the ball park. For instance a ceiling bounce will be diestance from camera to ceiling plus ceiling to subject. That is if you like ceiling bounces, I for one prefer a side wall bounce…