![]()
If you want to understand the chemical reactions at work during the processing of a film without going back to your school bench:
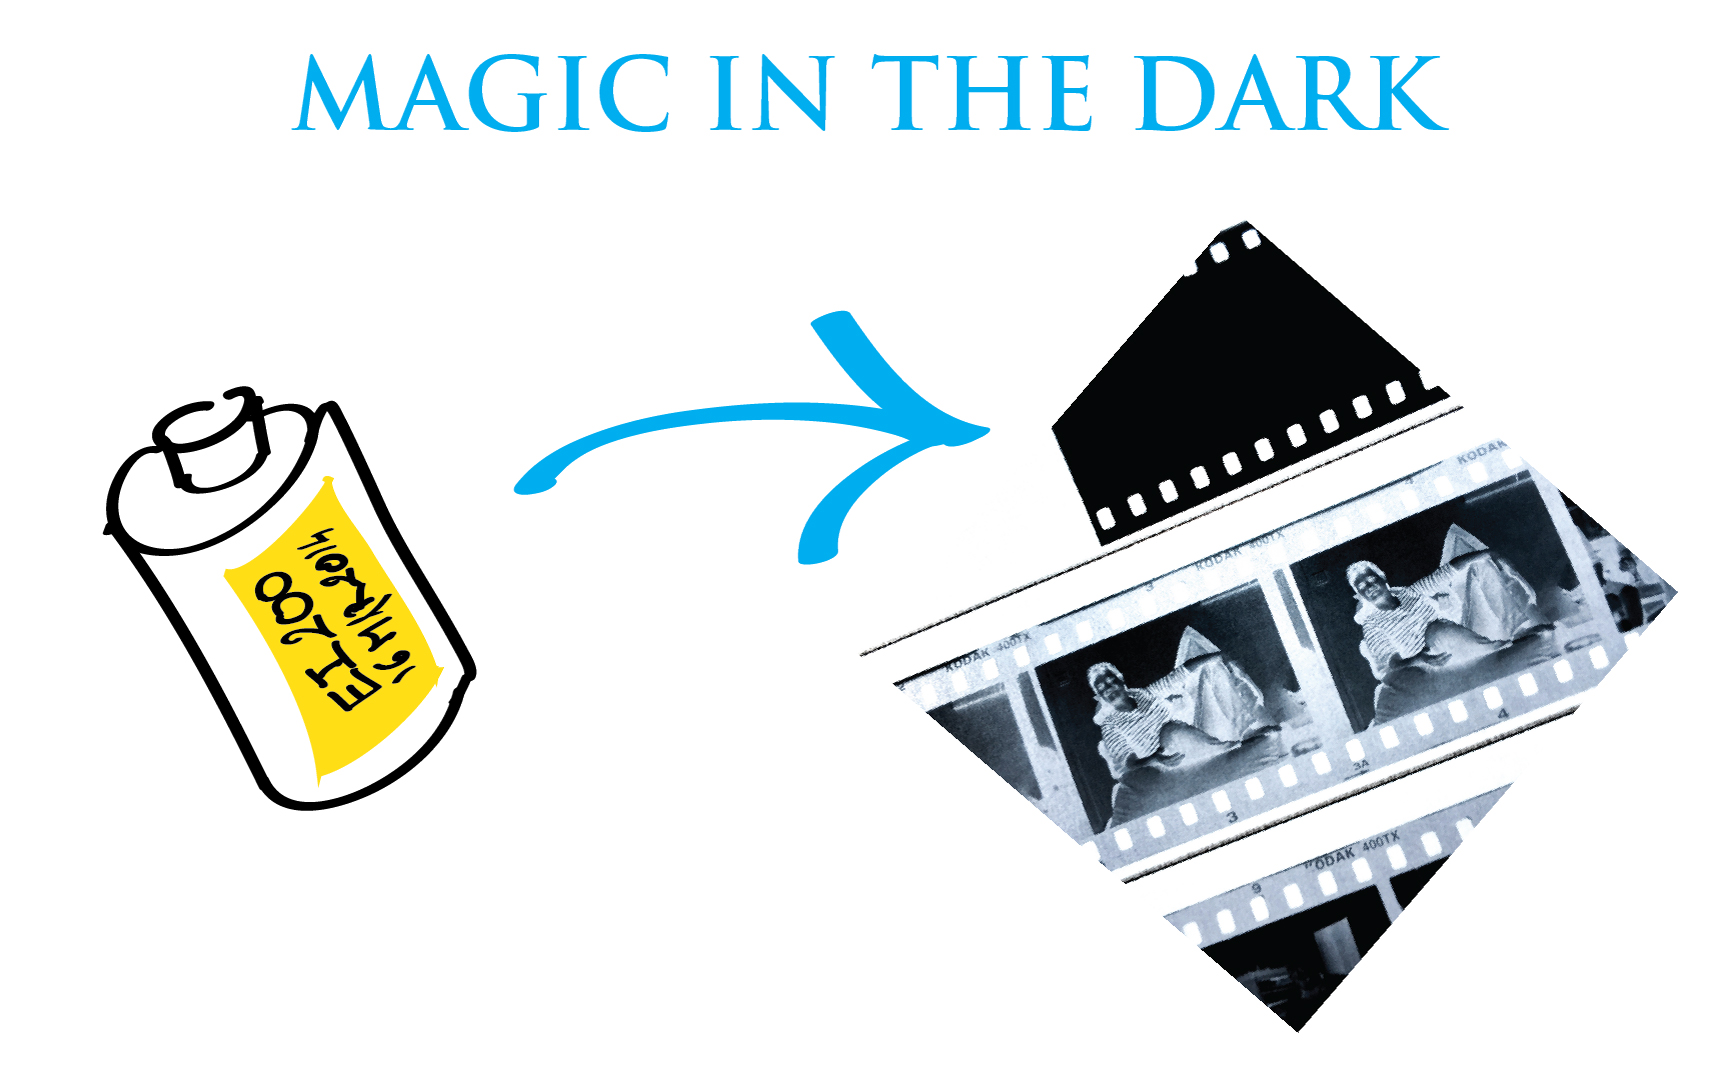
From a light sensitive black and white film, how do we obtain a negative which is no more light sensitive and can be observed in broad daylight ?
In 3 steps: (1) Exposure of the light sensitive emulsion followed by its processing, which are (2) the action of the developer agent and (3) the fixer agent. I will present below the essential procedures that cannot be omitted. Along these 3 majors steps a lot of other intermediary processes of secondary importance can be carried out, but for the sake of clarity I will leave them out.
First, let us look at a typical photographic film cross section in the following illustration (not to scale):
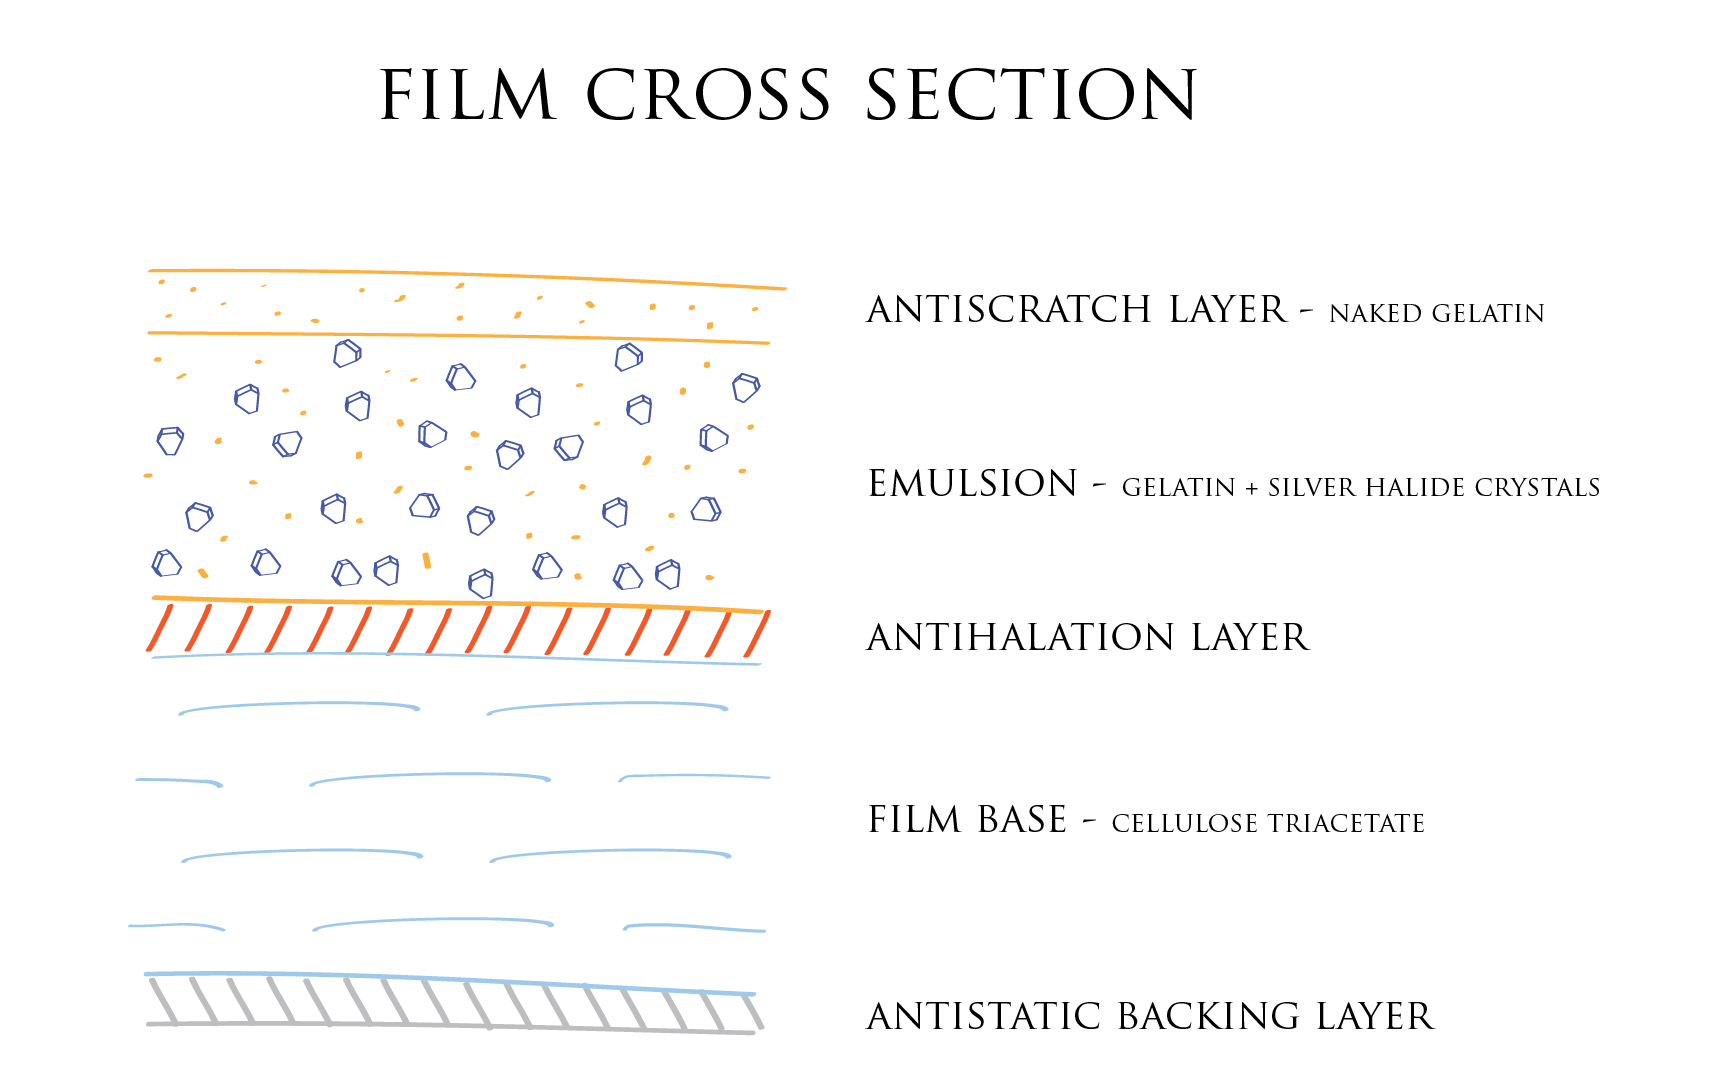
Silver halides make for the key component of the emulsion. Without them, no light sensitivity. These crystals are scattered in a gelatin substrate providing a buffered environment as well as stabilizing some chemical reactions. A cozy place of sorts.
Light sensitive Silver Halides used in film photography are mostly based on Chlorine [Cl] and Bromide [Br]. Silver Bromide [AgBr] being used often, this is the one we will use our examples.
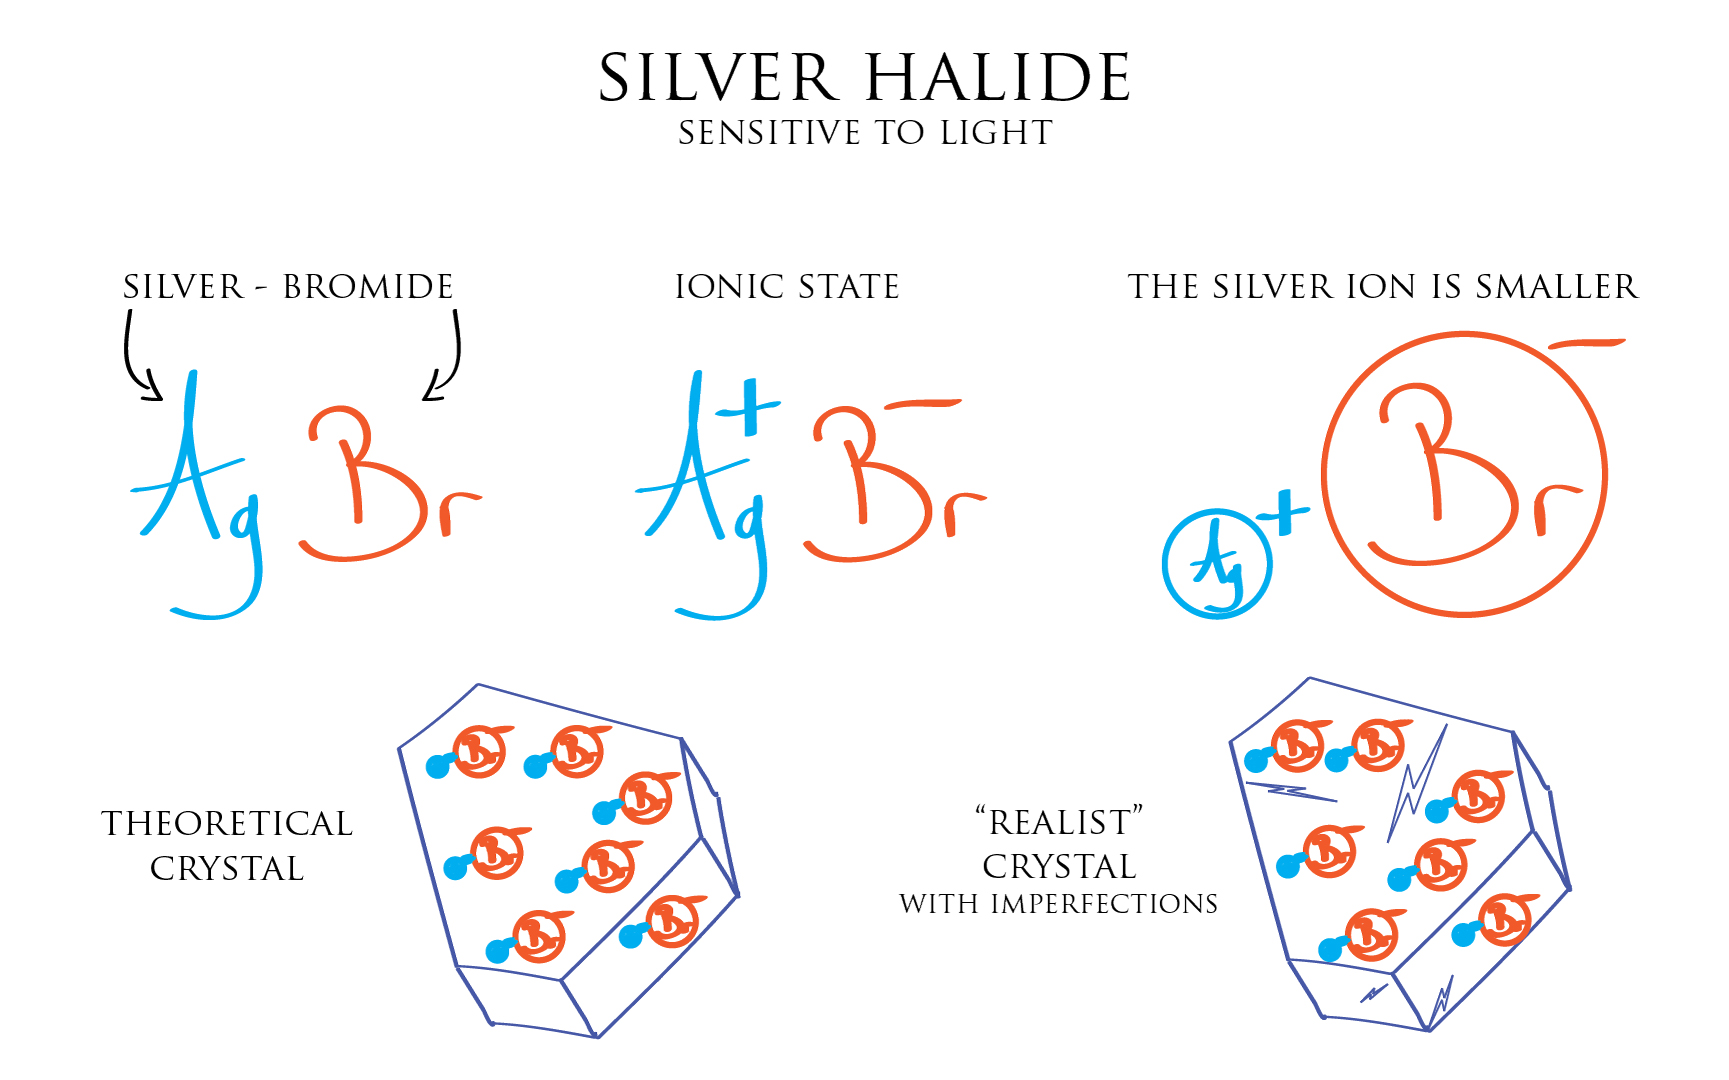
It’s worth noting the Bromide ion has a bigger volume than the Silver ion. And more importantly that real life crystals, made of well ordered stacks of Silver Bromide pairs, are not perfect stacks. They contain imperfections, cracks, shears but also impurities made of foreign atoms or molecules.
The importance of these imperfections is quite astounding as they are the key to the image forming process on film.
The image appears on the light sensitive film in 3 steps:
- First during the exposure i.e. when the shutter opens up to let a certain quantity of light or photons go through. It’s the moment when the latent image is being formed in the film emulsion.
- Then during the development when the latent image is “amplified” by the developing agent
- Lastly this developed latent image is fixed, it’s the fixing process, to become insensitive to light. It is the well known negative obtained as a result of a film being entirely processed.
Let us see how the latent image is formed in the following series of illustrations. The admitted theory reckons 3 steps in the forming process of this very distinctive latent image.
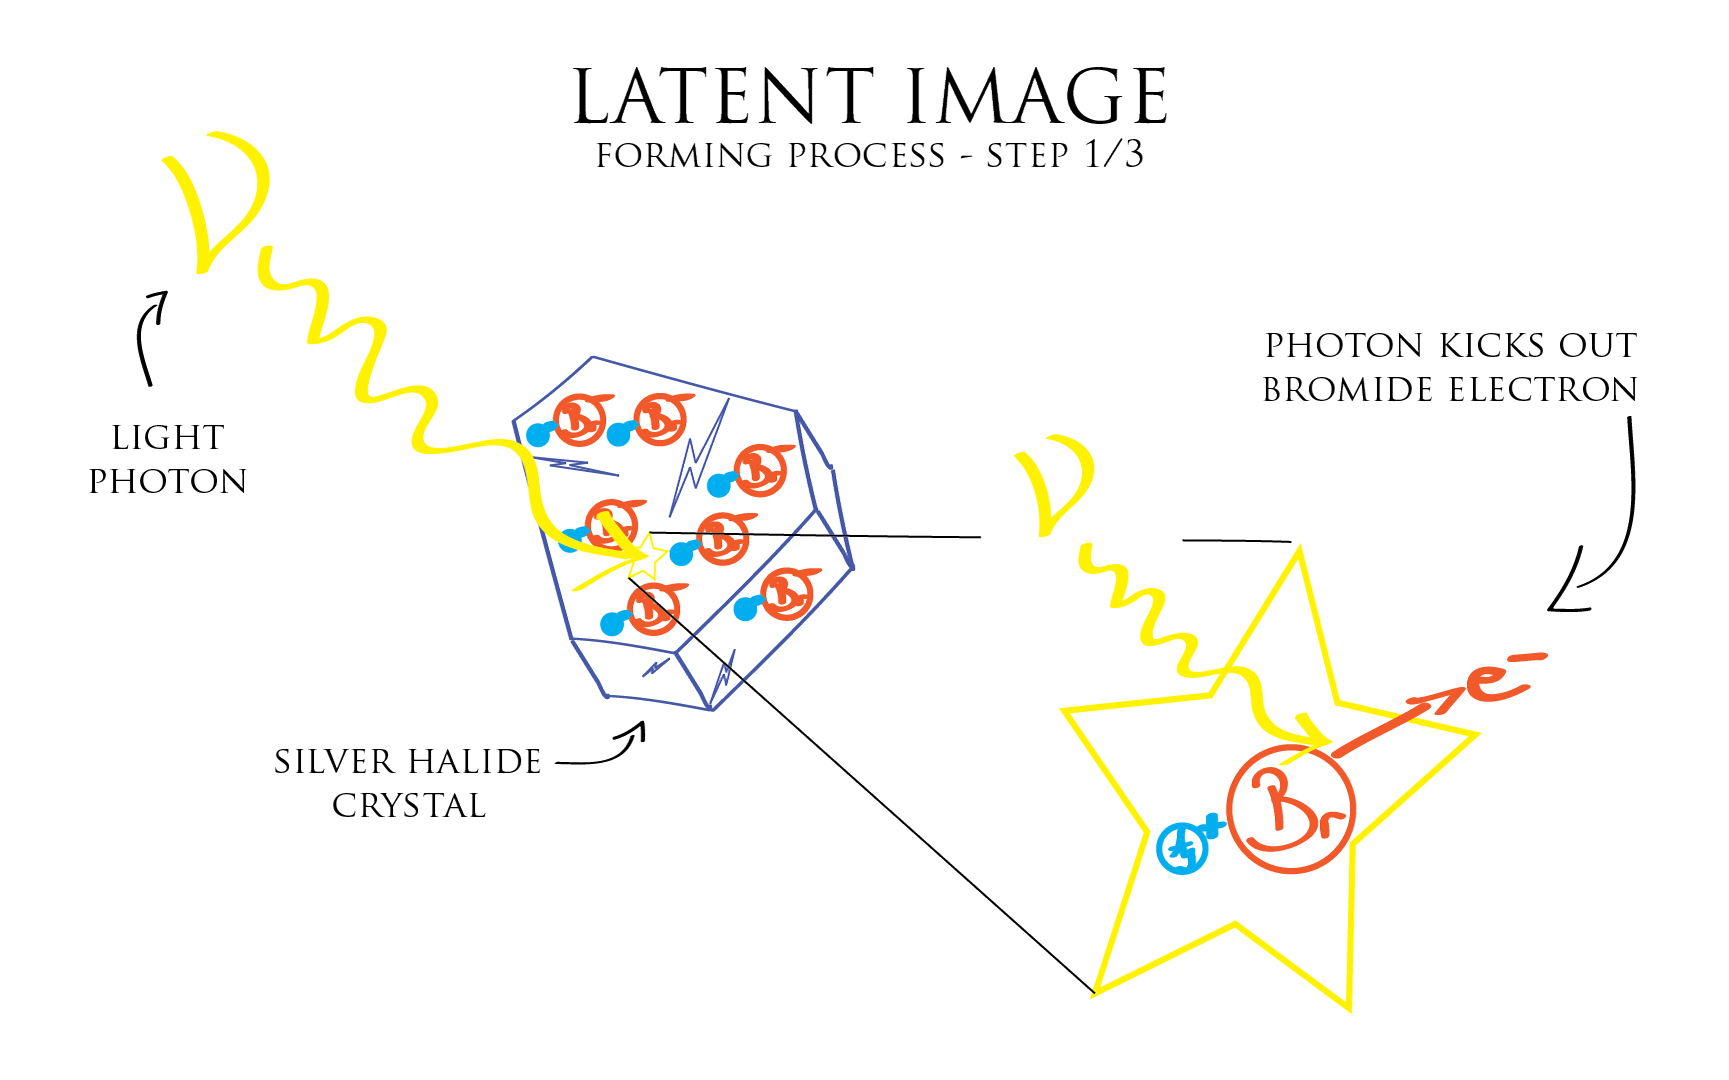
The first step of the latent image forming process is the exposure. It’s the moment when a photon of light strikes a Silver Halide crystal. In doing so it kicks out the supplementary electron of the large Bromide ion.
During the second phase of the latent image forming process, the kicked out electron, which has too much energy to be captured by the Silver ion, goes on to roam around the entire crystal. And so until being trapped by an imperfection, a local defect in the crystal structure, or by an impurity in the form of a foreign atom or molecule.
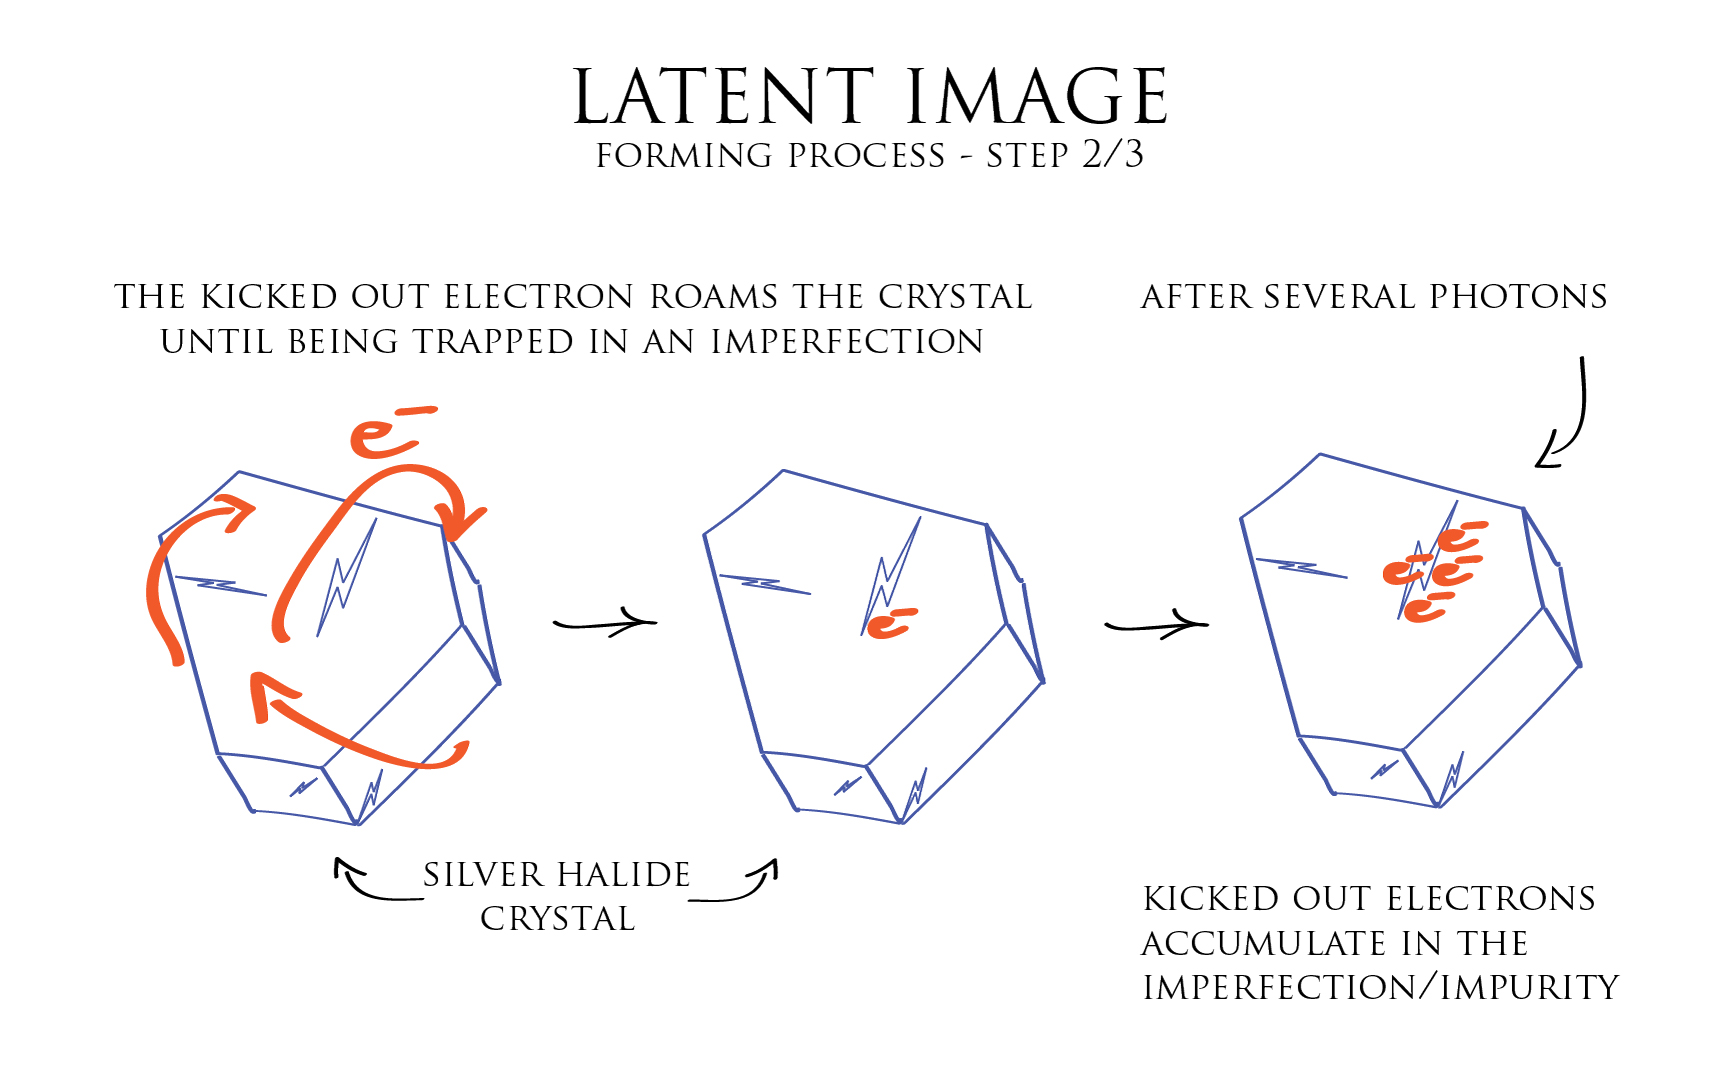
Then after several photons have stricken the crystal and kicked out electrons of their Bromide ion, an accumulation of those electrons is created around this local imperfection or impurity.
In the third step, this local accumulation of electrons generate a negative electric field that can attract towards itself the positive Silver ions not well set in the crystal structure. Each positive silver ion combining with an electron gives birth to a metallic Silver atom.
We rapidly end-up with a small gathering of metallic Silver atoms which correspond to a development seed. All crystals in the emulsion containing a development seed, form together what is called the latent image.

At macroscopic scale this image is not sufficiently contrasted to be usable as is. After all there is very little difference between an exposed crystal that contains a development seed and an unexposed crystal that does not contain such a seed i.e. a crystal not struck by light (or a photon).
This is where the developer agent function comes handy: it amplifies the difference between exposed crystals and non exposed ones by transforming the entire exposed crystal into metallic Silver just from the seed presence. The development seed acts as catalyst of the transformation.

The thought that the developer agent acts only on the Silver Halide crystal containing a development seed is only true during a certain time. In reality if we leave the emulsion in contact with the developer agent long enough, it will transform all crystals in the emulsion. The developer acts more on the difference in the reduction speed of Silver contained in the exposed crystals versus Silver contained in the unexposed ones.
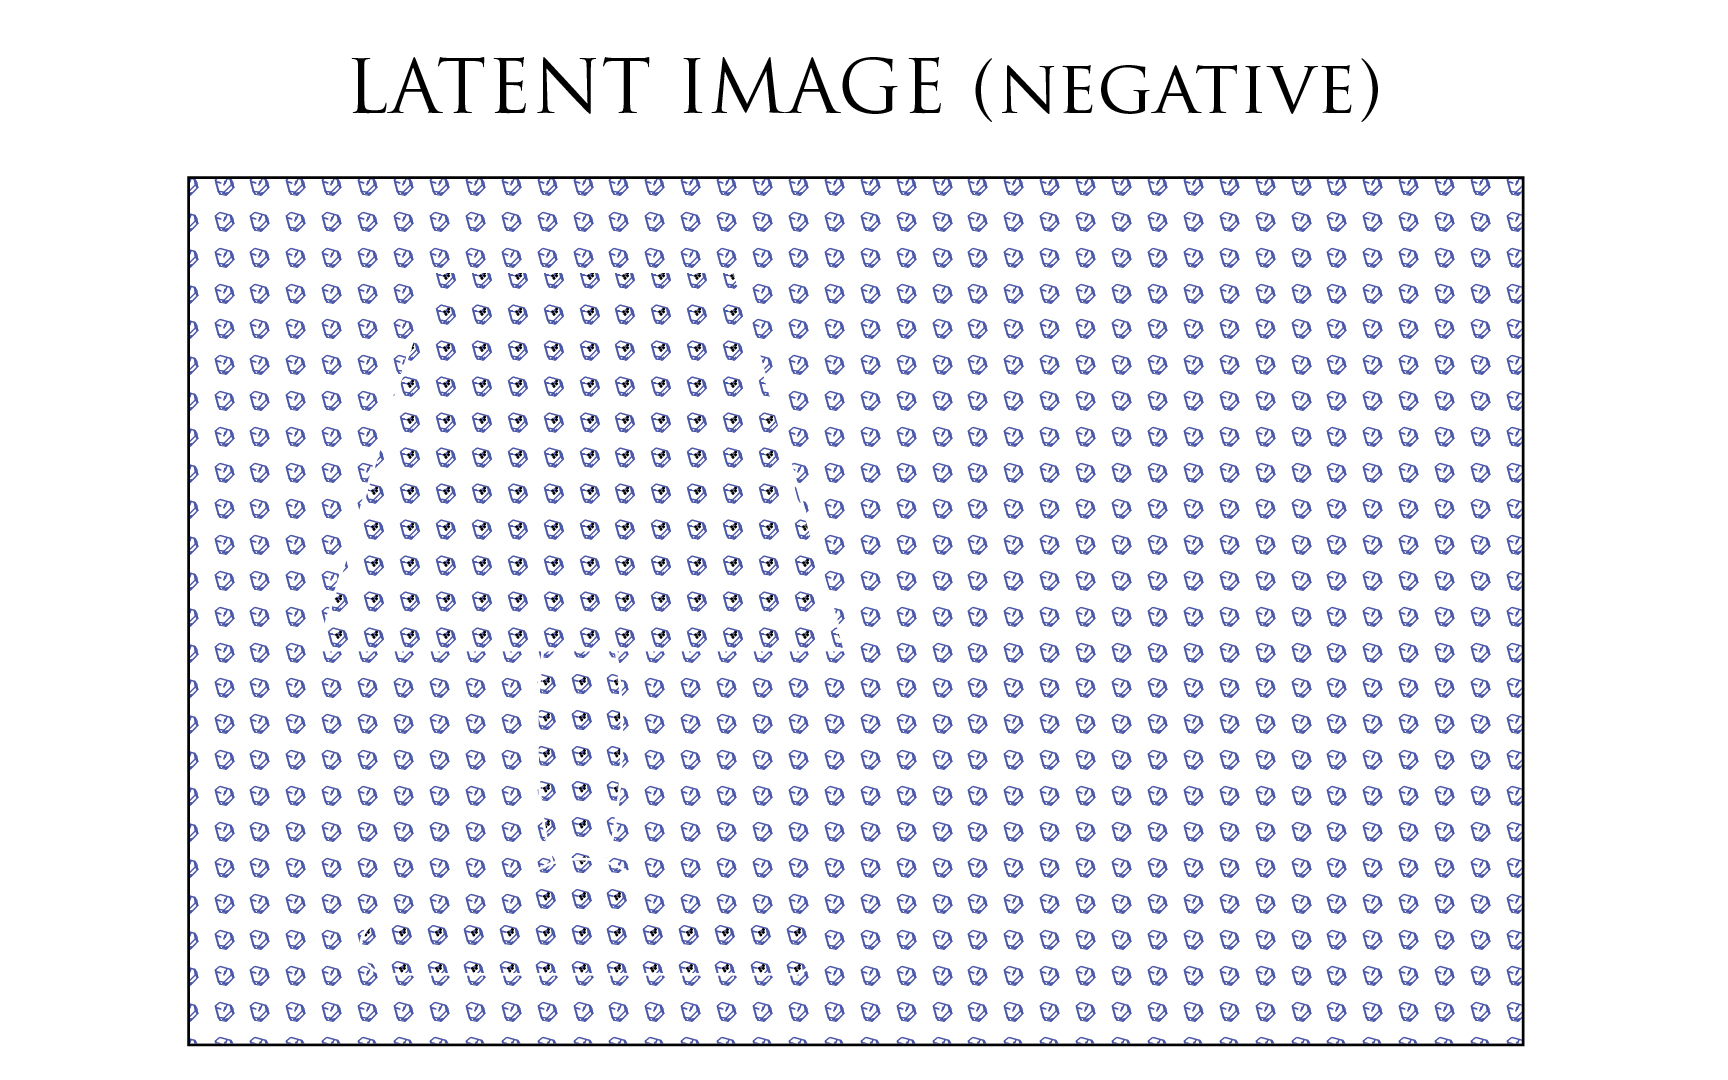
More down to earth, let us take the example below, a simple dark scene: a lit desk lamp on a dark desk, in a dark room.

Once the film exposed, the latent image is similar to the illustration below. The dark part of the scene matches the unexposed Silver Halides since no light struck them. The light part of the scene: the lamp, matches crystals dotted by a black point (representing the development seed) on the film emulsion.
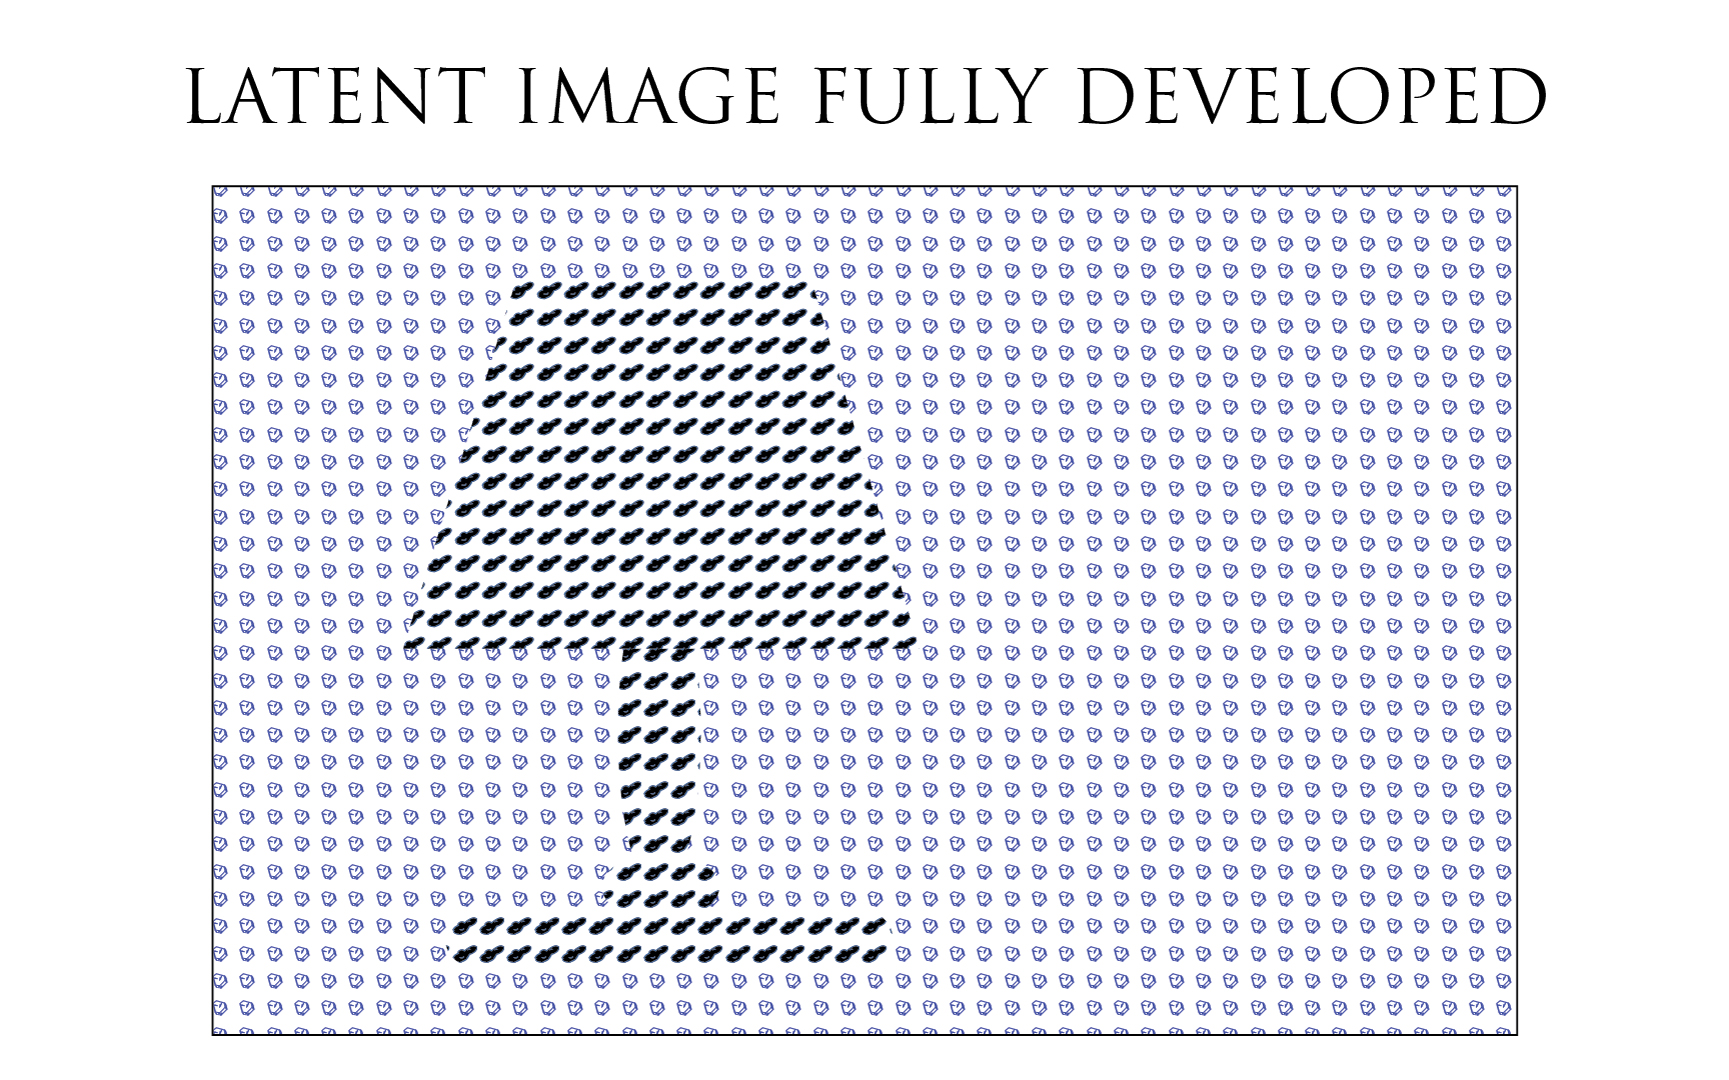
Then, the latent image is kind of intensified by the developer agent action and all exposed Silver Halide crystals will be entirely transformed into metallic Silver. The latent image is theretofore revealed or developed and its macroscopic density is now sufficient to be of some use.
Now we need to make the emulsion non sensitive to light anymore. The metallic Silver is already desensitized, but the Silver Halide crystals which were not exposed (the one corresponding to the dark part of the scene) are still light sensitive. The most obvious thing to do is to get rid of those i.e. flush them out of the emulsion. This is the function of the fixer agent, it dissolves the Silver Halides into a solution. By this mean, now being soluble, they can be flushed out with the fixer agent.
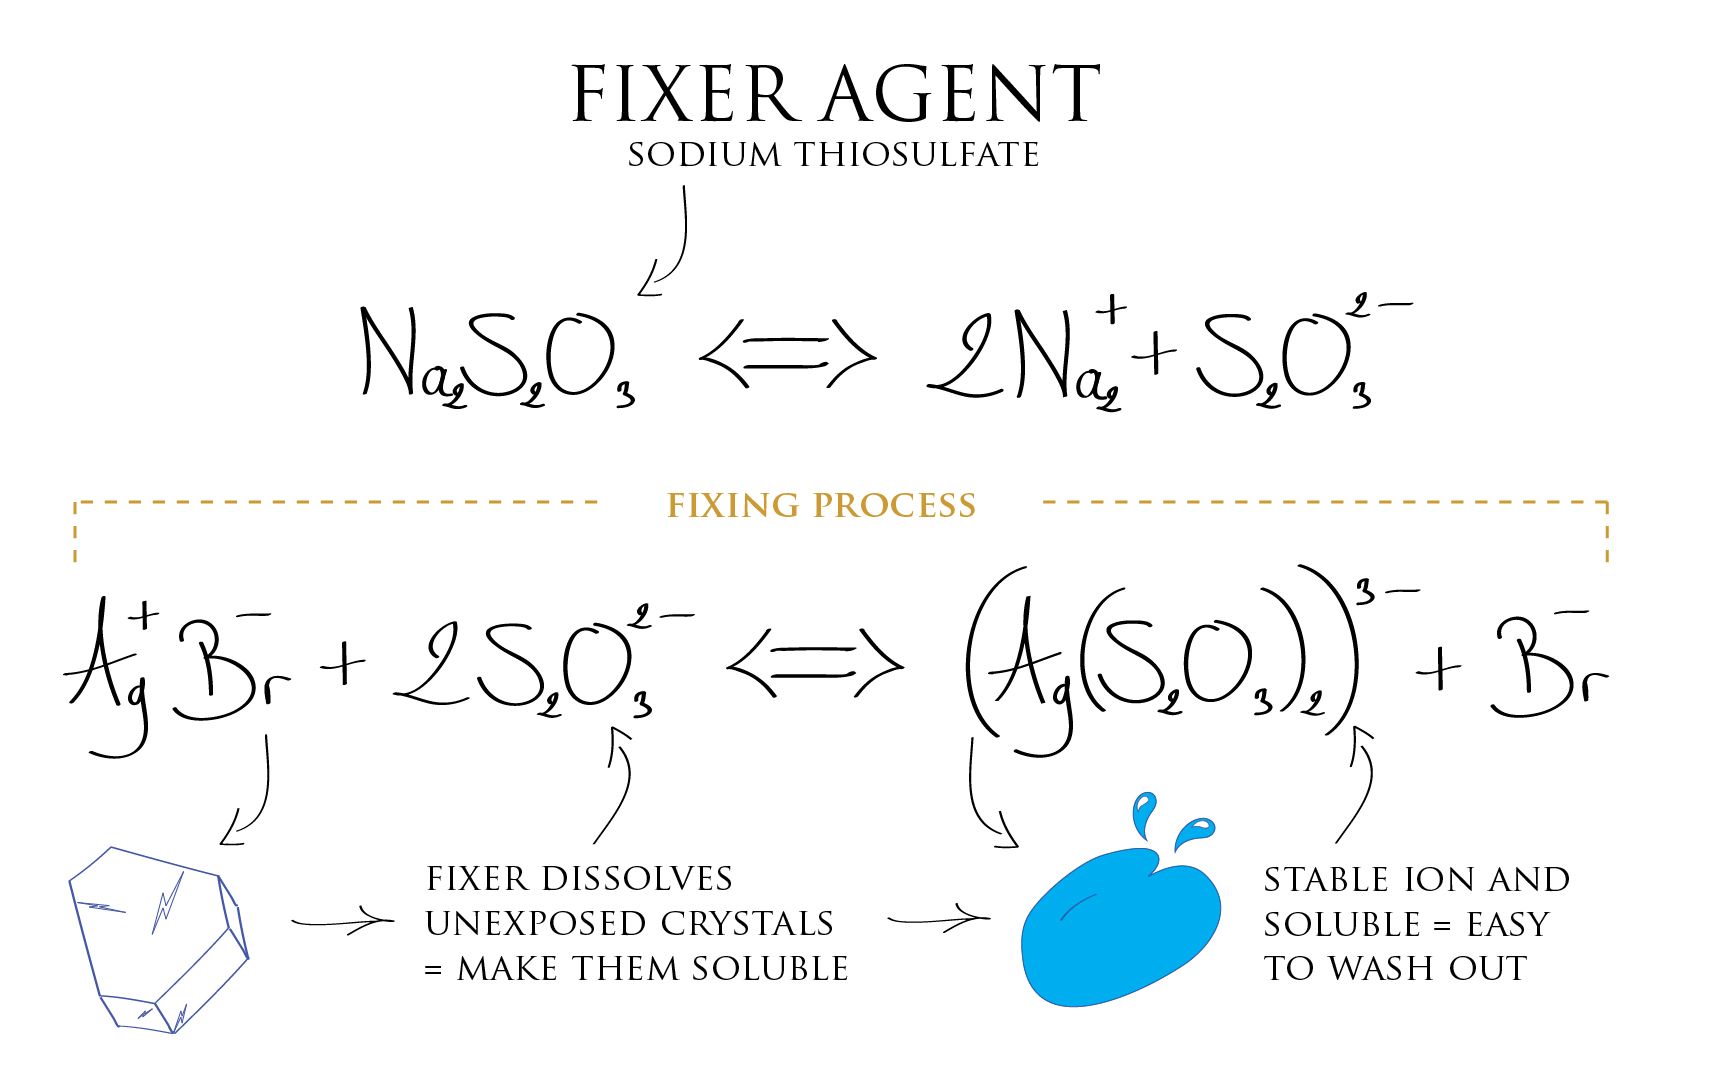
Silver ion already reduced to metallic Silver are not affected by the action of the fixer agent (*). We are therefore only getting rid of the emulsion components that did not received light. The Film base being transparent, emulsion parts having not received any light appear as transparent also because they are now devoid of unexposed Silver Halide which have been washed out. Whereas parts that did received light are loaded with metallic Silver, hence appearing opaque.
This is the reason why the negative holds its name, and gives a representation of the scene by transmitted light, through its opaque parts matching the light parts of the scene, and through its transparent parts matching the dark parts of the scene. The negative is actually a real photograph. We prefer to inverse it during the printing process for obvious common esthetic reasons, but it just remains an act of preference…
(*) This remains true if we don’t let the emulsion in contact with the fixer agent for too much time, because in the long run, eventually the fixer will also attack and dissolve metallic Silver. The control of chemical reactions timings during processing is therefore important in many respects.
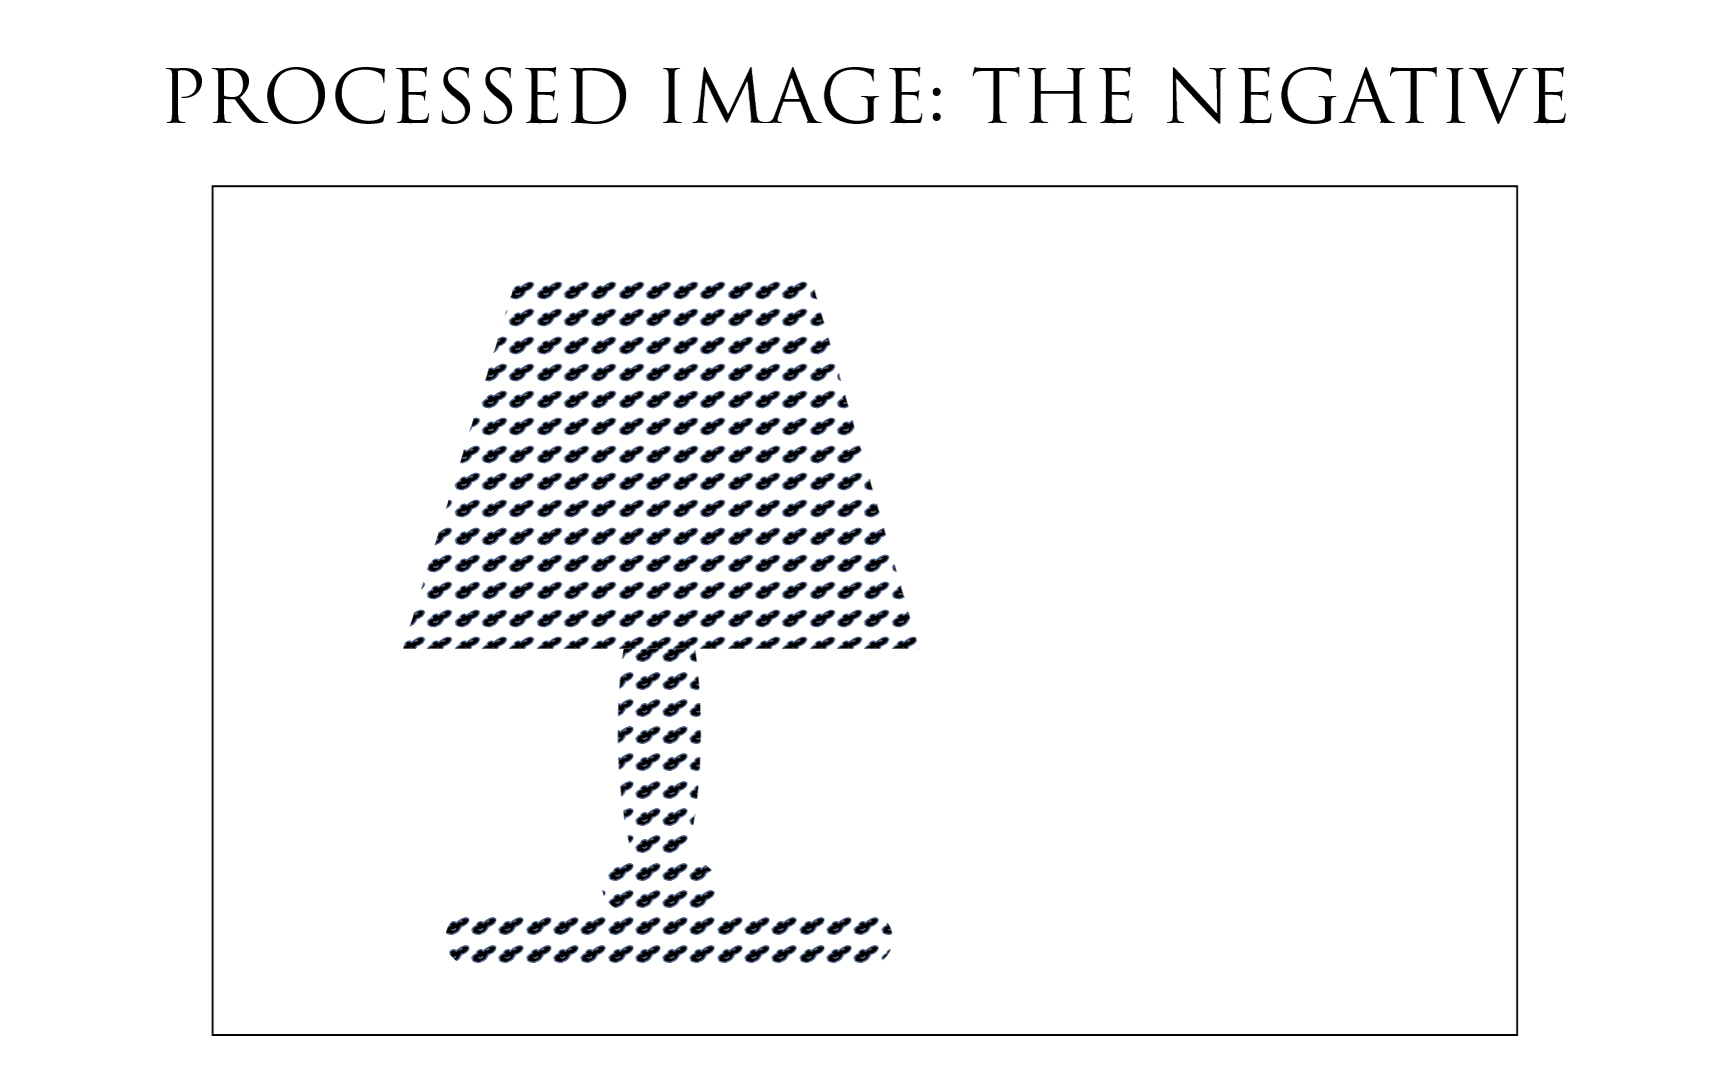
In this last illustration above, we can observe that only the exposed parts are covered with metallic Silver. But also that the unexposed parts of the film have been thoroughly cleaned by the fixer, and contain no more Silver Halides, nor do they contain any metallic Silver which could not have been formed in those areas.
The personal reason that initially pushed me to understand the chemical reactions occurring all along the processing of a photographic film was to know at which stage I could open my developing tank. Or in other words at which stage I could expose my processed film to light without deteriorating the image.
Clearly one needs to wait until the end of the fixing process before bringing the film in broad daylight.


Fantastically explained, thank you!! 😀