![]()
The DX code of 135 format films allows 24×36 film cameras equiped with an appropriate reading system to automatically recognise:
- The ISO speed of the film
- The number of exposures
- The latitude of exposure of this film
This code appears as a checkered cells grid (with silver and black cells) located on the back of the film cassette:
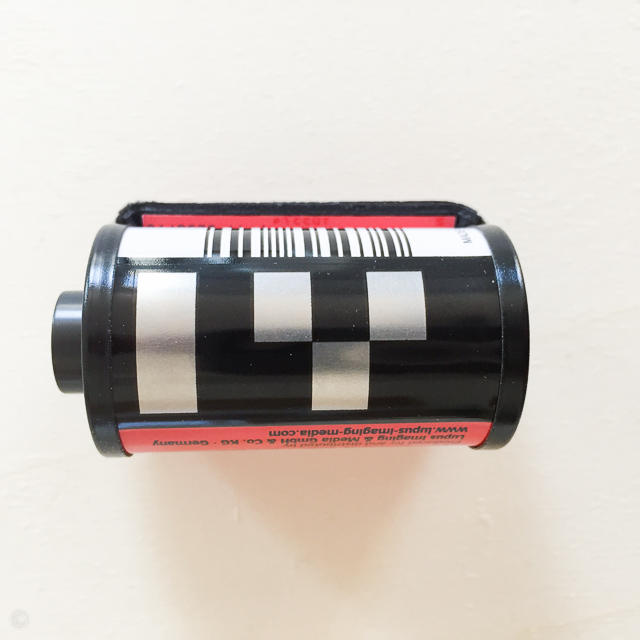
The code is printed during the manufacturing process, so informations 1, 2, 3 (c.f. above) are those recommended by the manufacturer. Some cameras allow to modify these informations readings at will, but the most rudimentary do not. I’m focusing on the latter: simple film cameras (often entirely automatic) provided with some DX code reading ability.
Why modify the DX code of a film ?
- To allow an entirely automatic camera to push or pull a film without “knowing” it
- To expose a film at a different ISO speed than the one recommended by the manufacturer
For reference these two last points may seem identical, but they really aren’t: in 1. we modify exposure AND development time, in 2. we modify exposure but NOT the development time, we work on a basis of an E.I. (Exposure Index)… Just a vocabulary note for the maniacs out there, nothing important.
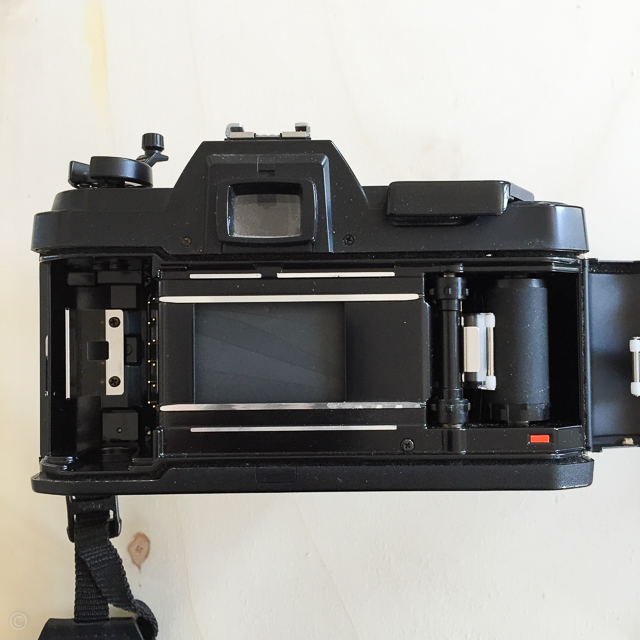
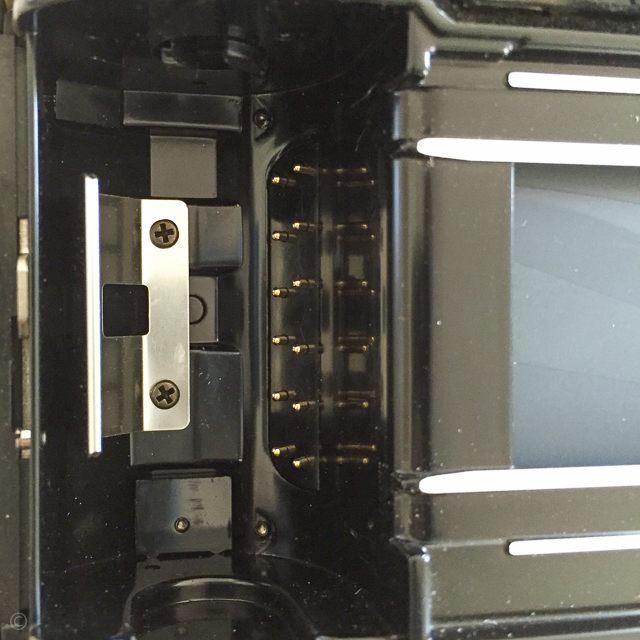
To read DX codes film cameras use electrical contacts similar to small pins with a rounded tip located where the film canister is placed in the back of the camera.
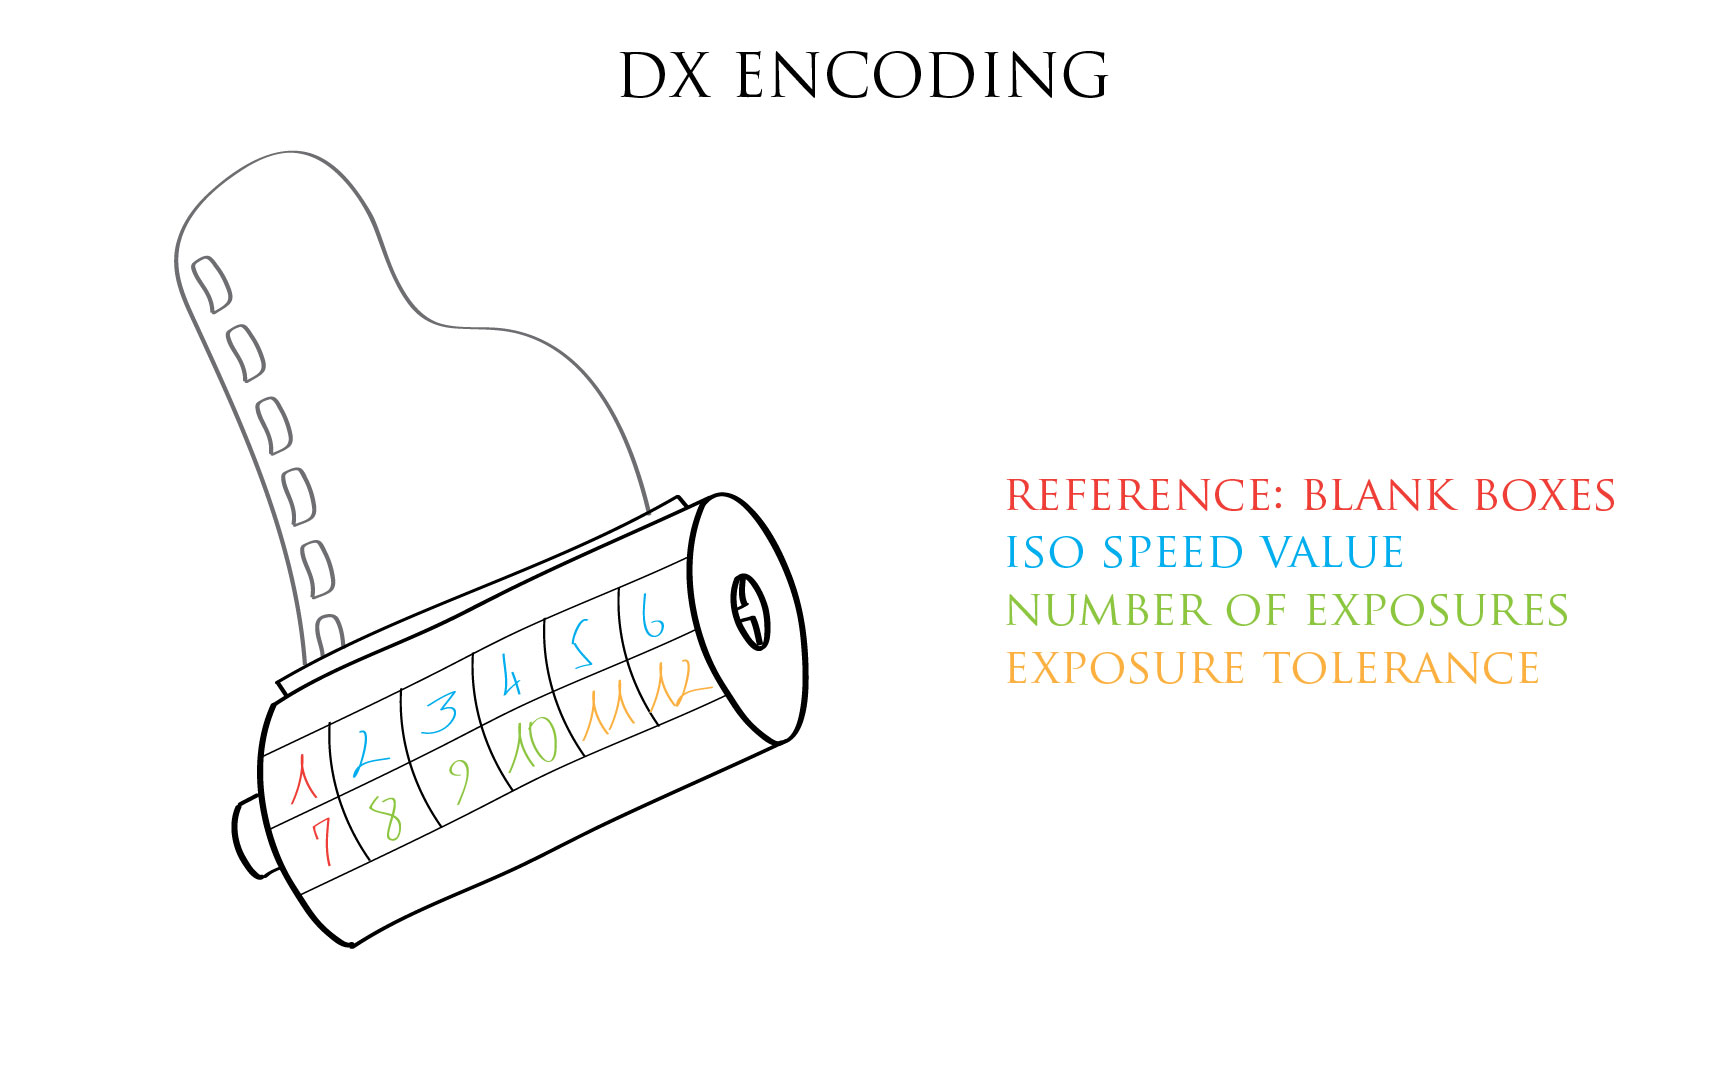
How the reading system operates: the DX code checkered grid is made of insulated black boxes (that do not conduct electricity) and non insulated silver boxes (that do conduct electricity, where the canister bare metal appears). So if we modify this code of checkered insulated and conductive cells we can modify the DX code at will.
One can achieve that in a very rudimentary way by scrapping off the insulating black paint and applying some nail varnish to insulate a few appropriate cells. But there is a more civilised way of doing this in a more practical way. I will make a video on how to do just that in a short while.
Modifying the number of exposures and the latitude of exposure is of small interest, all the more so since most of film camera with DX code reading only read the ISO speed information. The ISO sensitivity is coded on the first row of the checkered grid (cells 2 to 6):
In the file DX code template to download and/or print you will find all DX code templates ready to be printed. They fit the standard dimensions of a 135 format film. Only the different ISO speeds are coded (the first row of the DX code) in order to leave all the other informations untouched. I will use this file for making the video of the procedure that I will put online in a few days.
For the time being it is enough to scrap off all the black paint and to paste at the same place one of the template of the attached file. Without forgetting to cut off all the white cells that is … but there is an even simpler way.


Hey, I tested this modifying technique with Kodak Pro Image 100. I pushed to 200. But today when I was trying to modify Colorplus 200 to 400 I couldn’t! I guess the problem is with ISO 400 code, because I putted this 400 dx code into a Pro Image and my display recognized it with ISO 200. What’s the problem that I have? Do you know?
Thank you so much,
Mateus.
Hi Mateus,
I see two likely explanations: 1/ You may have mispositioned the tag on the canister or 2/ The codes are differing only in cell nb 4,3,2, my best guess is that cell nb 4 is not producing contact and appears like an insulated area to the electrical pin sensor. I would just make sure cell nb 4 is entering in contact with the pin and that cells 3 and 2 are well insulated.
I would vote for 2/, also another explanation would be that the dx pin sensors in the camera are a bit bent, offseted, or damaged, but a visual inspection should clear up most of these concerns.
WRT the tags themselves, there is no mistake: the 400 ISO DX code given in the file is the proper one (I’ve just checked). If issues in 2/ have been cleared then just make sure the tag covers the adequate row of the DX code. See here: http://www.film-photography-blog.com/how-to-modify-the-dx-code-of-a-film-cassette/
I hope this helps.
Cheers!